In the previous post, we talked about how I came up with a side project idea to explore: making 3D Bronze maps while targeting the location-art home decor market.
In this post we are going to review the manufacturing process. How do you create a bronze mountain replica based on real-life mountain data?
This is part 2 in a 4 part series.
Part #1: $1.5K In Sales Selling 3D Bronze Maps - Idea Generation + Validation
Part #2: Making My Way Through Manufacturing: 3D Printing + Bronze Casting
Part #3: Behind The Scenes: Brand Identity (Logo, Photography) & Admin Tasks (Tools Used, Automation)
Part #4: Sales: Trying To Sell A Physical Product From Scratch
Who am I? My name is Greg Kamradt and I am the founder of Terra Mano, we make handcrafted maps of American landscapes. Think 3D printed mountains cast in bronze geared towards outdoor athletes, mountain lovers, and vacationers.
One of the reasons I picked up this project was to try something I knew nothing about. A few people have asked about this process so I wanted to write it out for others. This post is what I would have liked to read at the beginning of the journey.
-
TL:DR: Download elevation data, translate it into a 3D model, 3D print that model, find a foundry to cast the 3D print in bronze, and finally, mount it on a wood block.
This long post has a lot of detail. If you don’t read through, skip to the TL;DRs of each section and check out the pictures
We will cover:
Elevation Data & Heightmaps
3D Printing
Bronze Casting
Mounting Wood Blocks
Elevation Data
TL;DR: Download your elevation data from USGS, further refine that data in QGIS and Blender
The entire process starts with spatial data.
Our goal is to take data about a terrain’s height and turn it into a physical 3D print, mountains and all.
Turns out there are a couple types of data that could be used. The two main types we considered were DEM & Point Cloud.
Digital Elevation Model (DEM)
DEMs are 2D perspectives of the earth from the sky.
There are two types of DEMs:
Digital Surface Model (DSM) - You get the elevation data for earth + the artifacts on top (bridges, buildings, trees, etc.)
Digital Terrain Model (DTM) - You get the elevation data for the bare earth. Nothing on top
Most often DEM data, or heightmaps, are just regular pictures. Huge high definition 2D images.
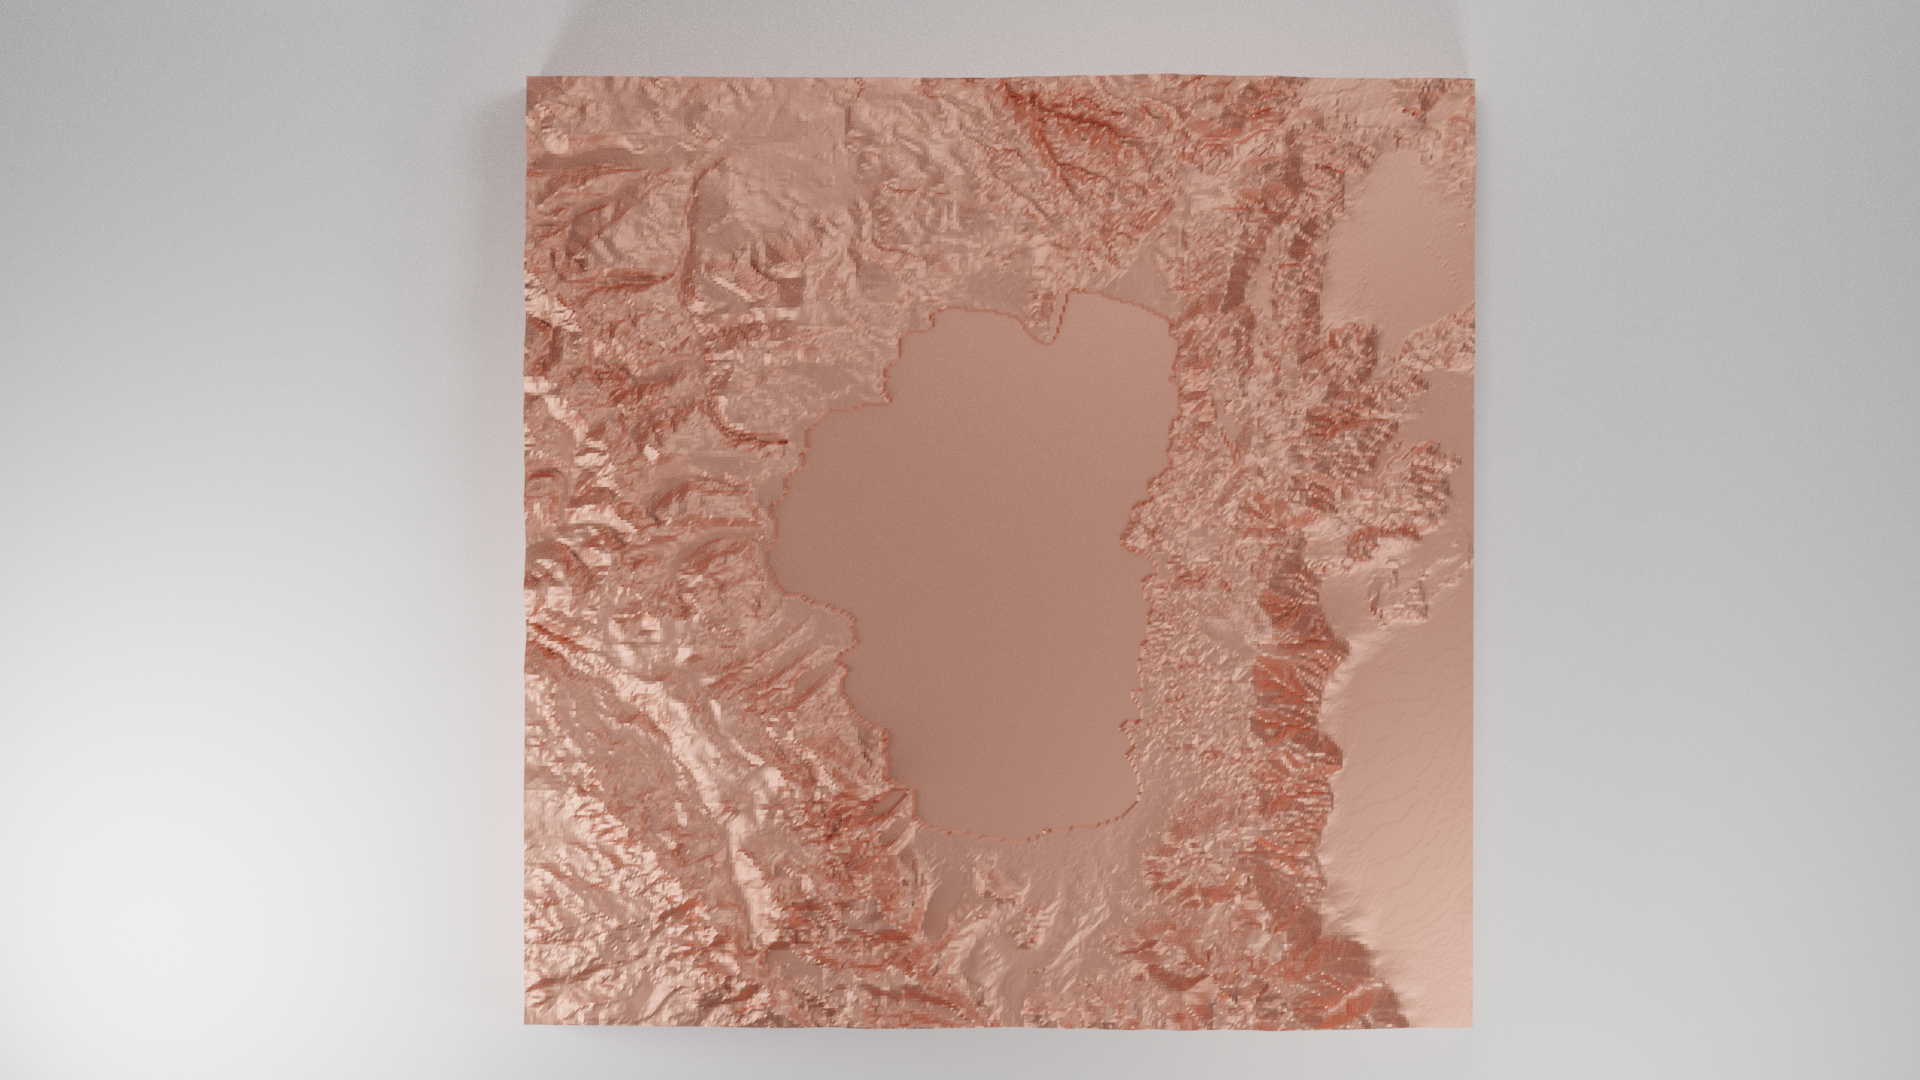
Here is a sample of what a sample heightmap looks like for Mt. Rainier:
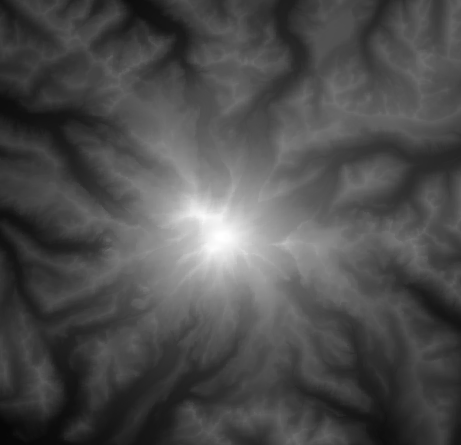
As you can see, it’s a grayscale image. Each pixel represents a data point or location near Rainier. The white pixels (top of Rainier in the middle) represent the highest points, the black pixels represent the lowest.
Every other gray color represents the elevation in between. You know...the hills, valleys, and rivers.
Datasets are commonly referenced by their resolution. A “⅓ Arc Second” dataset will have an elevation data point every ⅓ Arc Second, or roughly 10 meters (~30 feet). See below for common DEM resolutions.
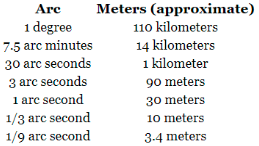
Almost all of the US has ⅓ arc second coverage. How cool is that? You could map the whole US with elevation and have a data point every 10 meters or 32ft. That’s an insane amount of data.
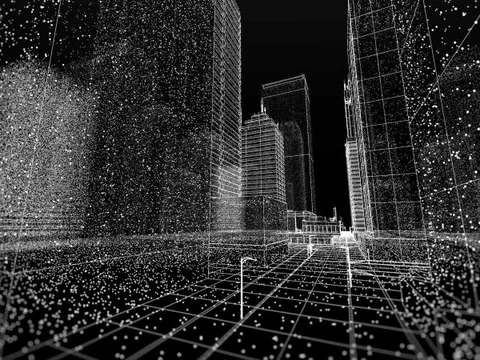
Point Cloud
Think of point cloud dataset as points in a 3D space. Where as DEM data points would only have an X and Y value, point cloud datasets have X, Y, and Z. This is very helpful for modeling out walls or cliffs that overhang the ground.
For example, say we were to make a model of El Capitan, the famous rock wall in Yosemite Valley. If we were to look straight down on El Cap from the sky (like the heightmaps above), we wouldn’t be able to see all of the cool features and rock climbing routes.
However, with point cloud data, we would be able to see onto the wall as if we were standing on the ground
This data is usually captured using LiDAR from a plane, the ground, or drone.
Elevation Data Sources
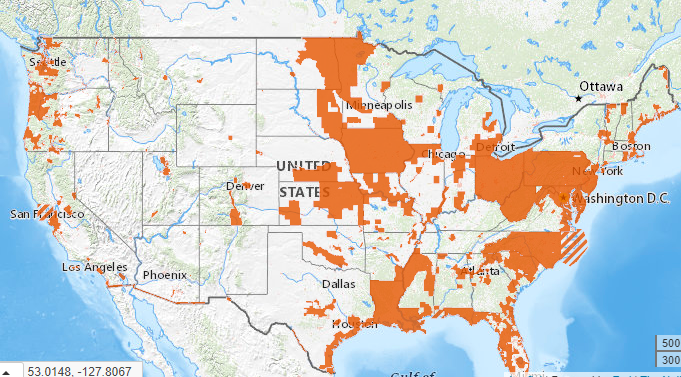
I got the Lake Tahoe DEM data from NationalMap.Gov. There is a huge amount of free data to download. You can easily see which parts of the US are covered with different resolutions.
Here is the coverage for 1/9th arc second data - a data point every 11 ft
Turning Your Elevation Data Into A 3D Model
After you have your data, the next step is to turn it into a 3D model. This sounds simple, but I had no idea what I was doing in the beginning and it took a lot of trial and error.
When I started off, I paid a guy $100 on Upwork to take heightmap data and make a 3D model for me. This was extremely slow. After a few bad iterations, I opted to learn it myself.
There are two types of programs you need
Geographic Information System (GIS) Program to work with your elevation data.
3D Modeling Program to work with your 3D model and do any touch ups to it
- Examples: AutoDesk Fusion 360, Rhino, and Blender
For GIS I went with QGIS because:
QGIS is free
Most importantly - I found an easy plug-in that converted my elevation data to a 3D printable version
For 3D Modeling I settled on Blender because
Blender is free
Blender has a ton of youtube tutorials and documentation
I knew Blender was used for making awesome 3D renders. I didn’t mind learning a little side skill
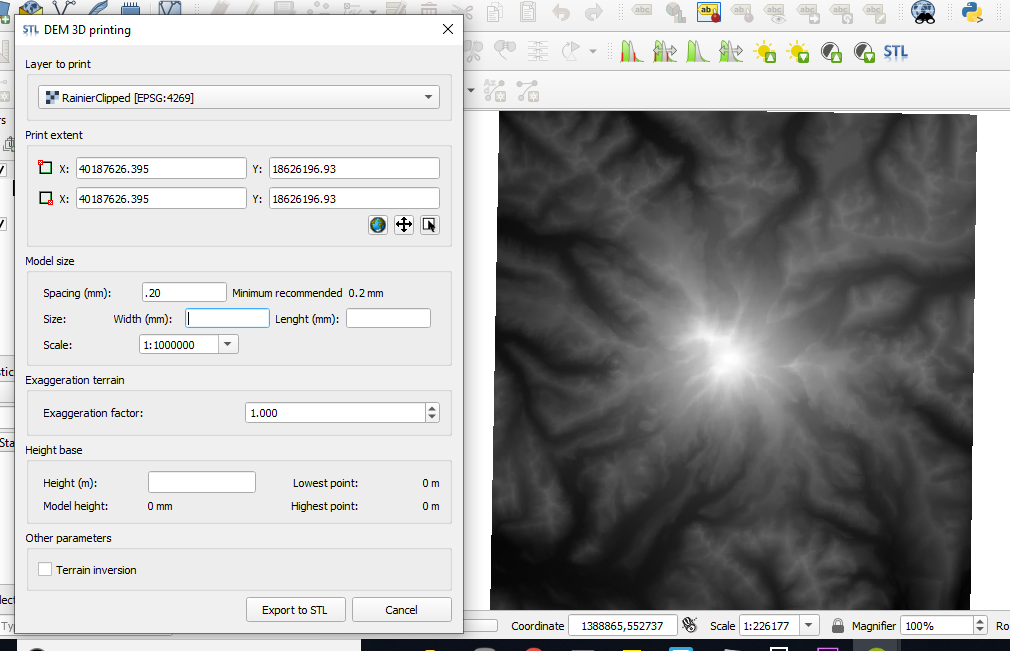
Luckily QGIS had a plug in DEMto3D (props to Francisco Javier Venceslá Simon for developing it) that translated your heightmap into a 3D model. It’s a bare bones tool, but it gets you what you need.
You select the area you want, tell it what resolution you want your 3D model, and let it do the work. If you need a good tutorial, I found this one very helpful: 3D printing of digital elevation models with QGIS.
Pro tip: : Make sure you set up your Coordinate Reference Systems (CRS) properly. If you don’t your map area could come out squished in the North to South.
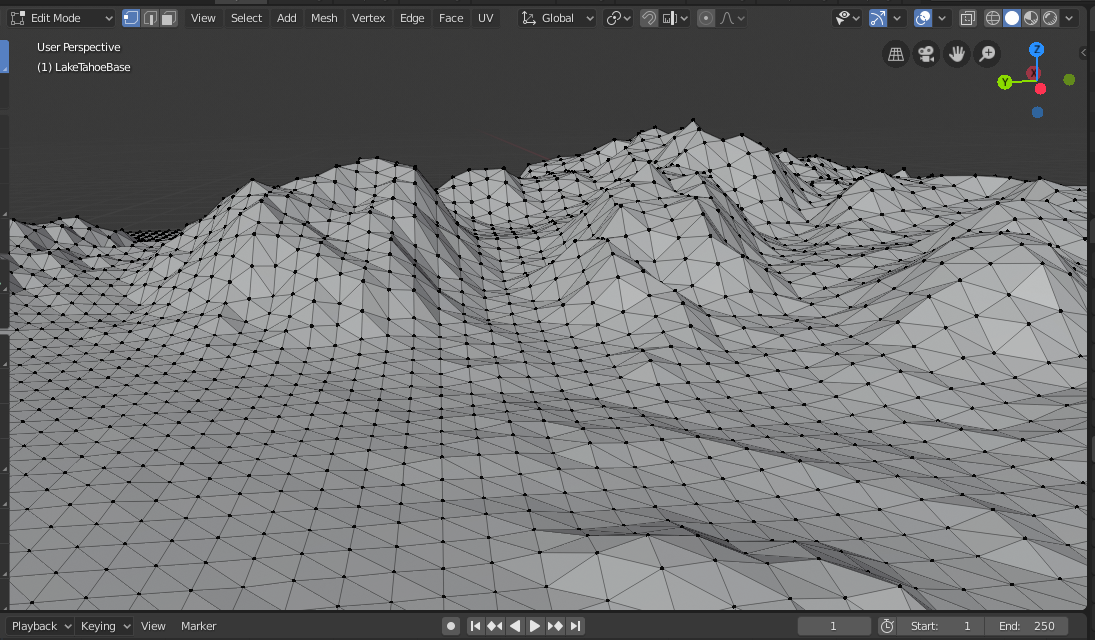
The output of this program is a Standard Tessellation Language file, or .STL file. Think of it as basically a bunch of triangles put together. It’s one of the most common file types to 3D print solid objects with. Here’s what the triangles look like close up on a mountain.
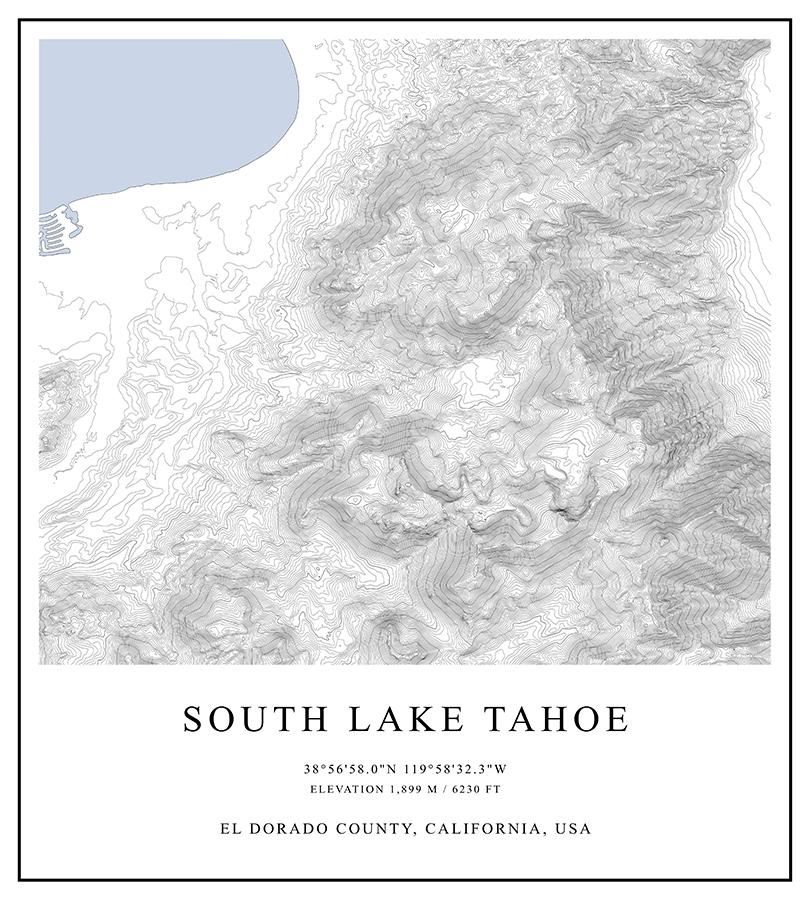
Side note: Another cool thing about GIS software is the ability to make contour lines and maps. There are many companies making “artsy” maps for different locations. Here’s a sample poster I made for South Lake Tahoe
One common technique cartographers (map makers) do is apply “vertical exaggeration” to a 3D model. This means literally stretching out the mountains to make them taller. This helps show off the features, but at the same time it degrades the realistic look.
Here’s a dramatic example of Vertical Exaggeration of the Lake Tahoe Bronze.
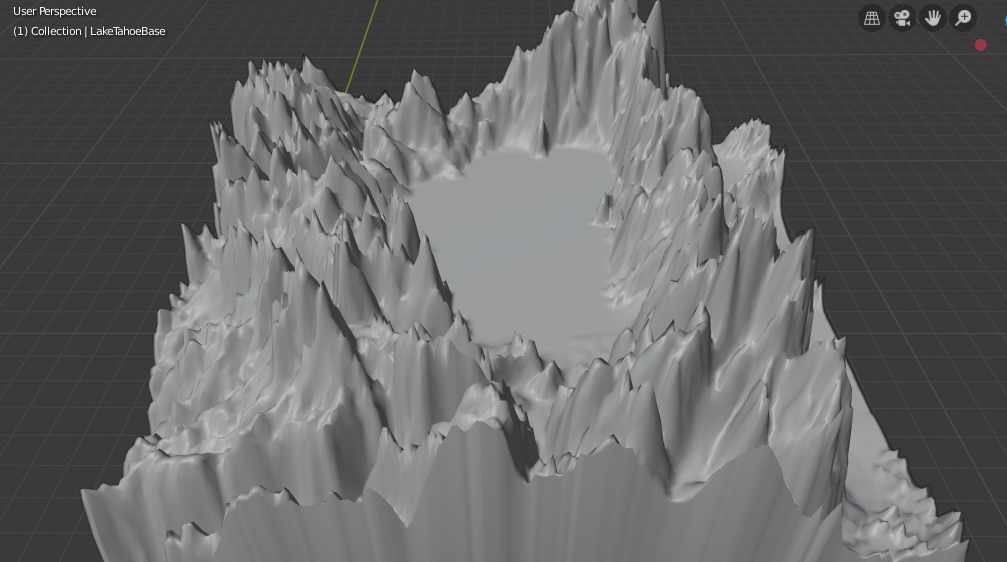
I tried to keep my Vertical Exaggeration as low as possible. But since this is a creative piece, I added 5% - 15% occasionally.
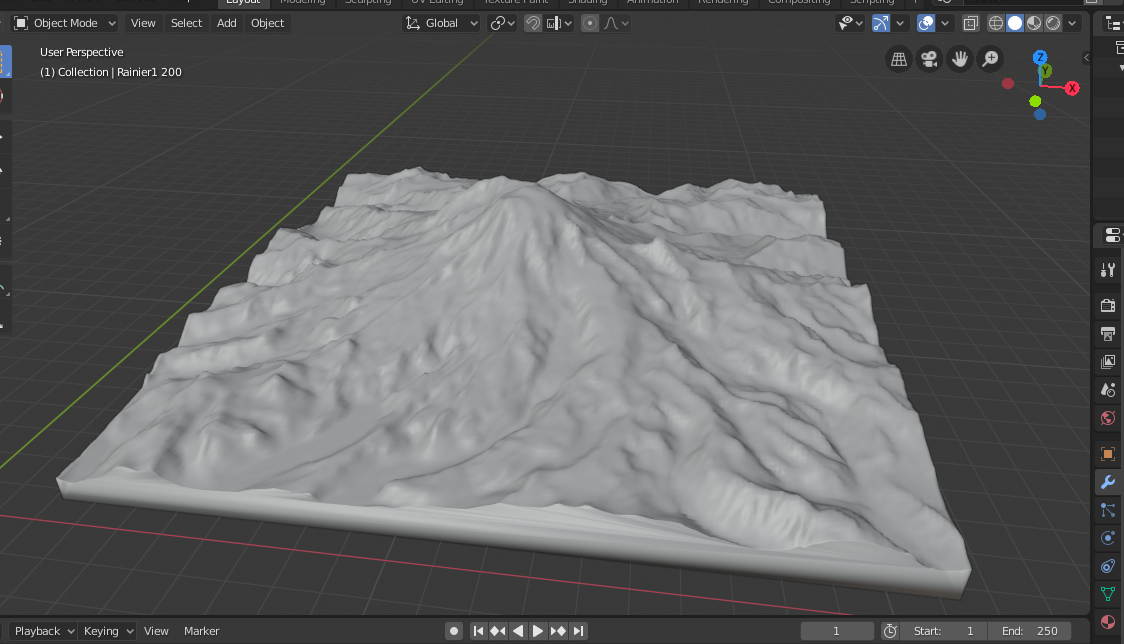
Once you have your .STL file you can view it in blender. Here is the default view of what Mt. Rainier looks like.
Another awesome thing about blender is its ability to render objects with realistic results. Here is that same model but rendered out with a basic light and floor added to the scene.
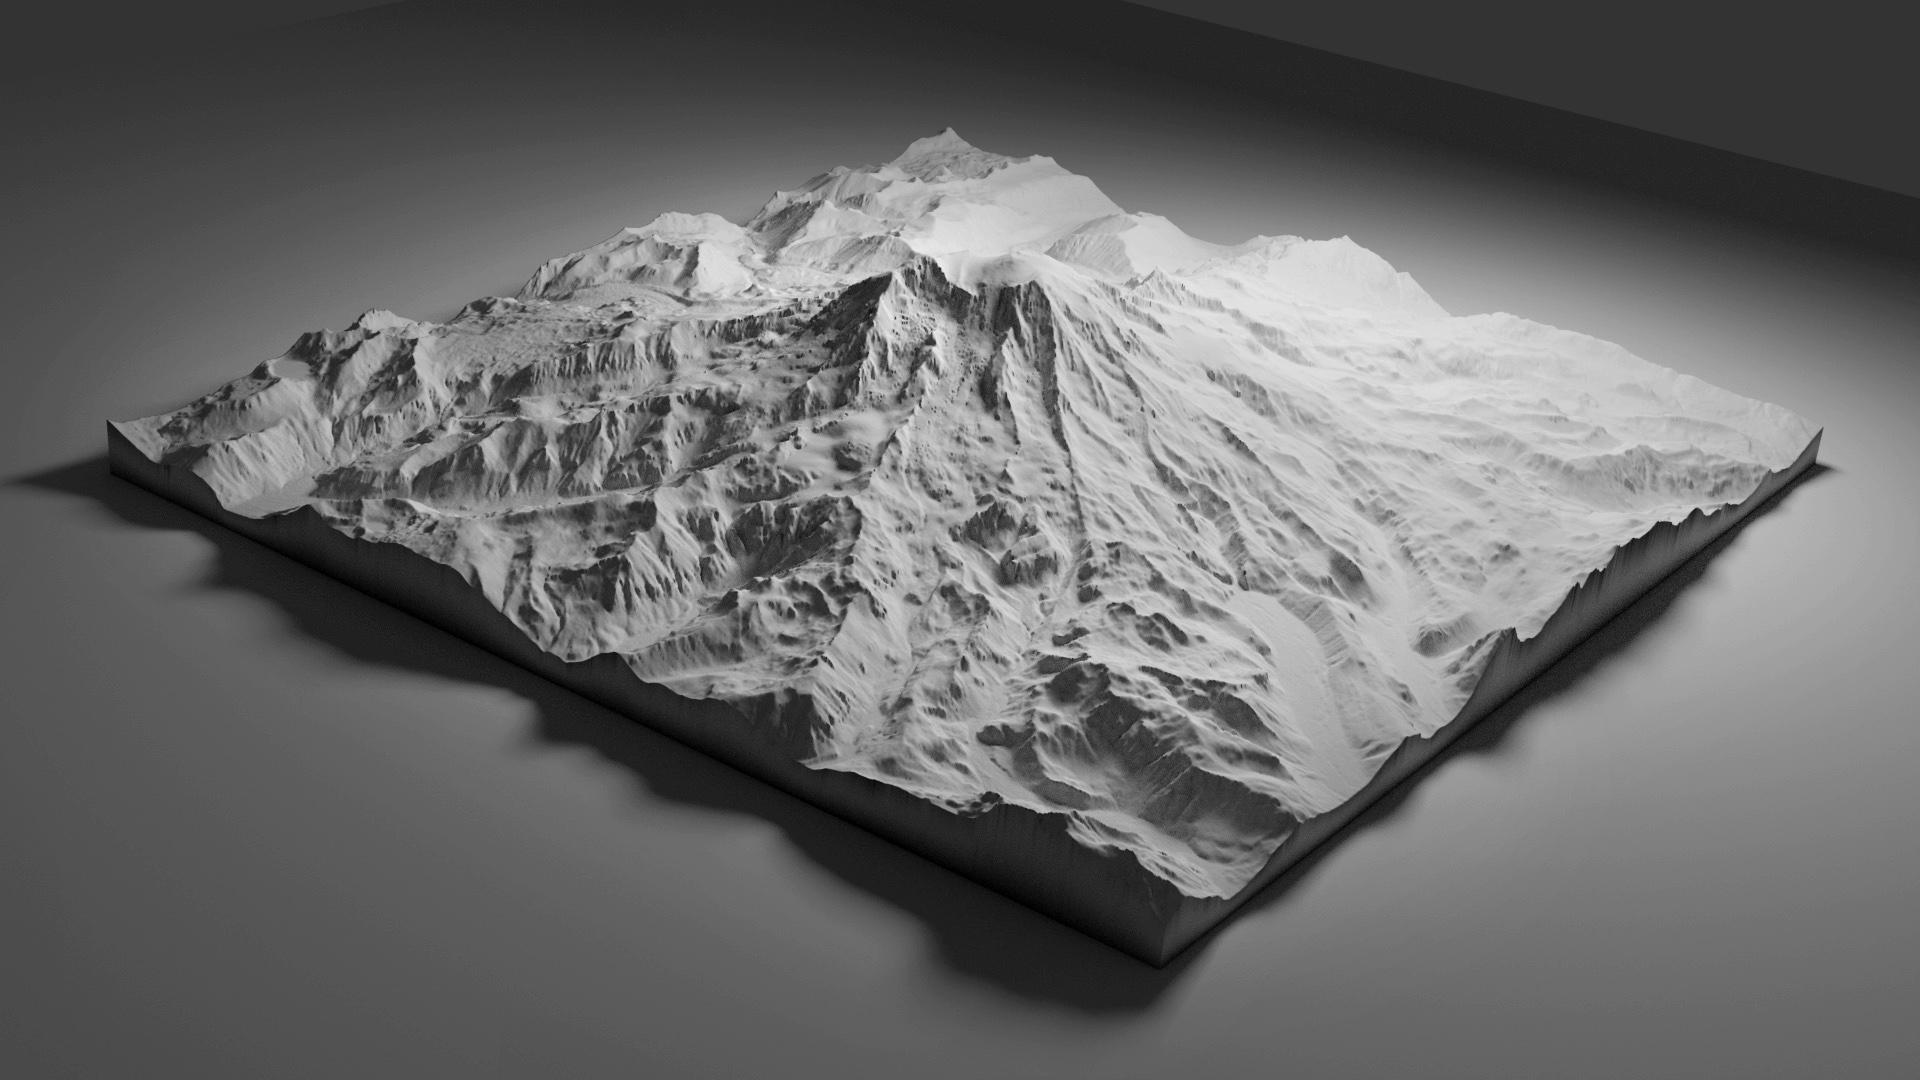
And one with a rotating light. Isn’t rendering in blender sweet?
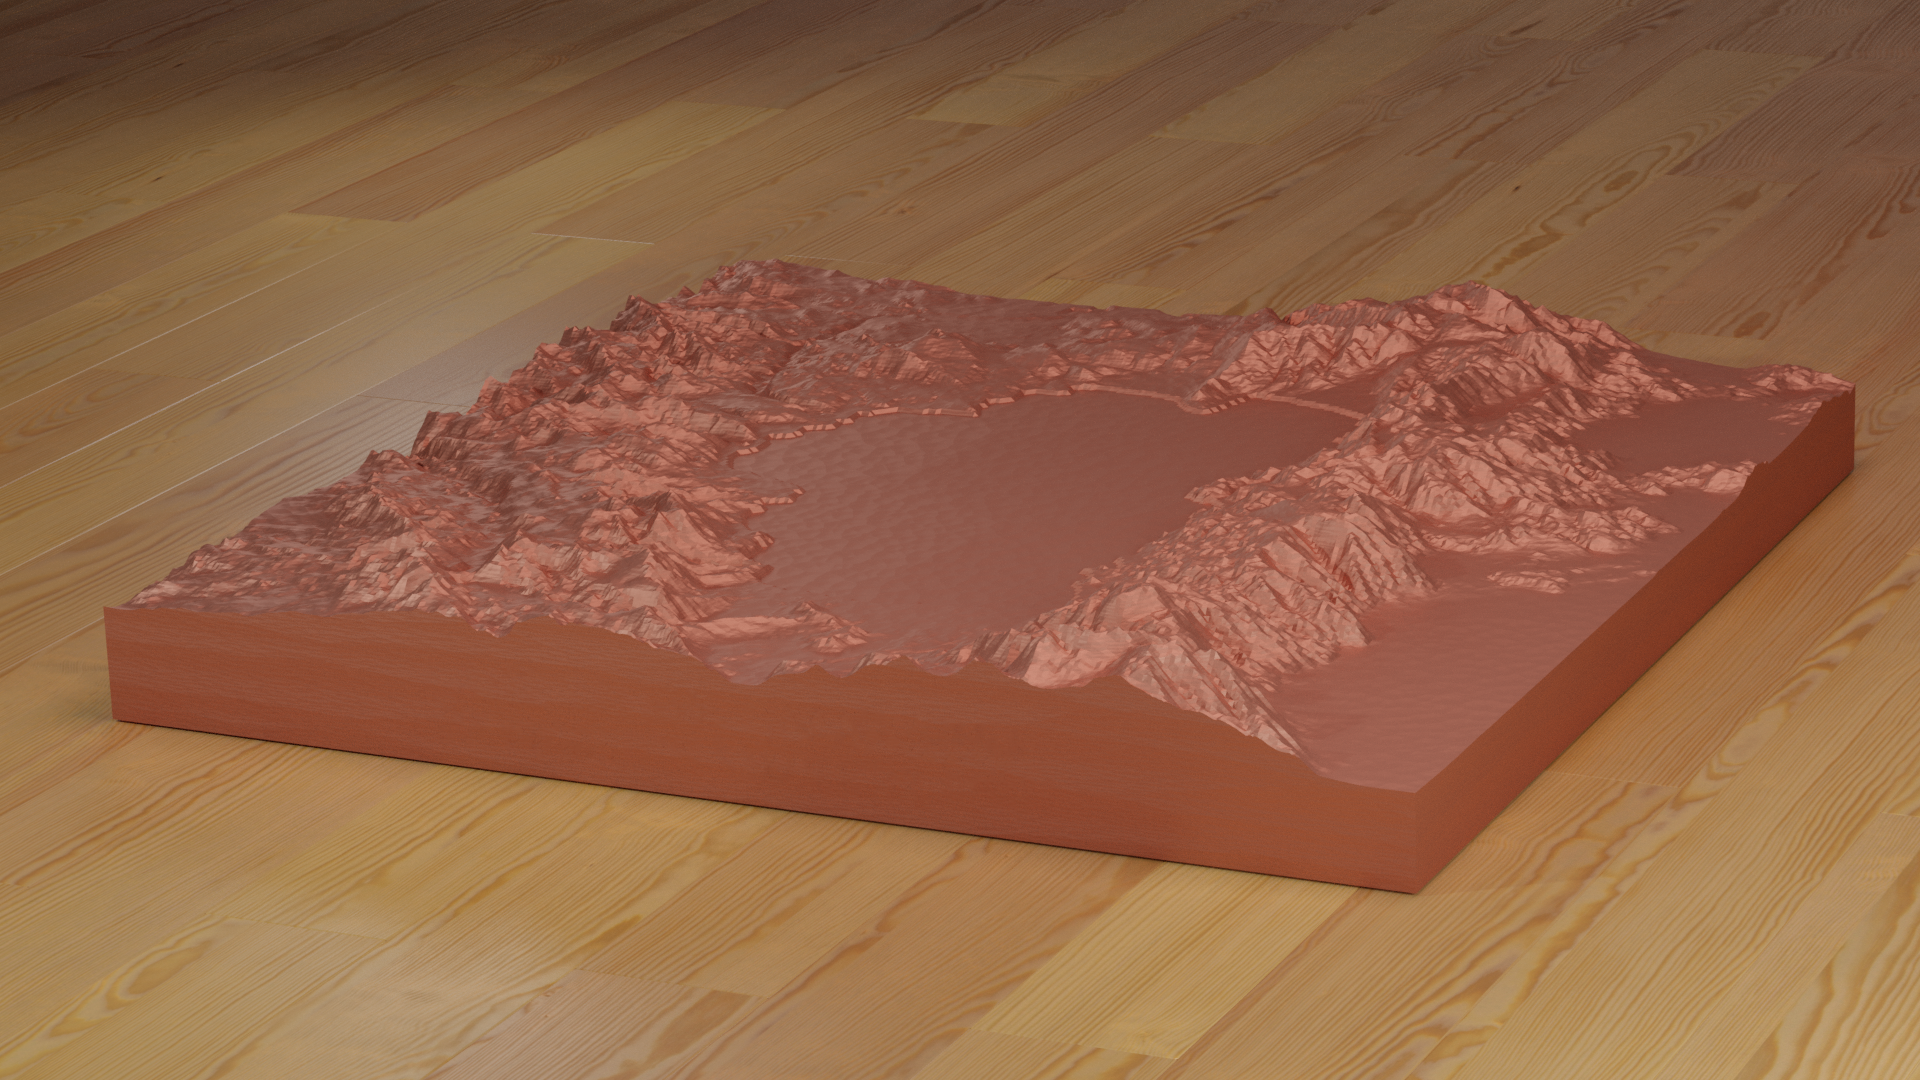
I attempted to do a bronze render for Lake Tahoe. However, it ended up looking phony and I realized I had hit my limit of quick learning on rendering.
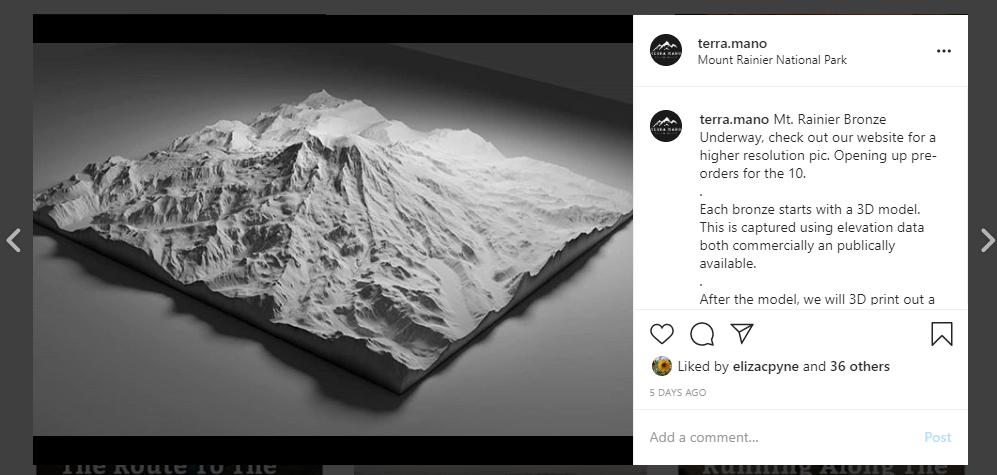
Rendering your model first helps testing iterations of models, getting customer feedback, and doing minimal work before 3D printing. Here’s an instagram post I published to gauge customer reaction.
Once you decide to move forward in the process, it’s time to get your model 3D printed.
However, before you do 3D print you need to hollow out your model. This means instead of printing a solid block of your mountain, you print a shell of your mountain. You remove the material inside your print (which you won’t see), and leave all of the detail on the outside (which you will see). This saves time, money, and weight aka shipping costs.
Here’s that same Rainier but shown with the inside taken out. This is done with the Solidify Modifier in Blender.
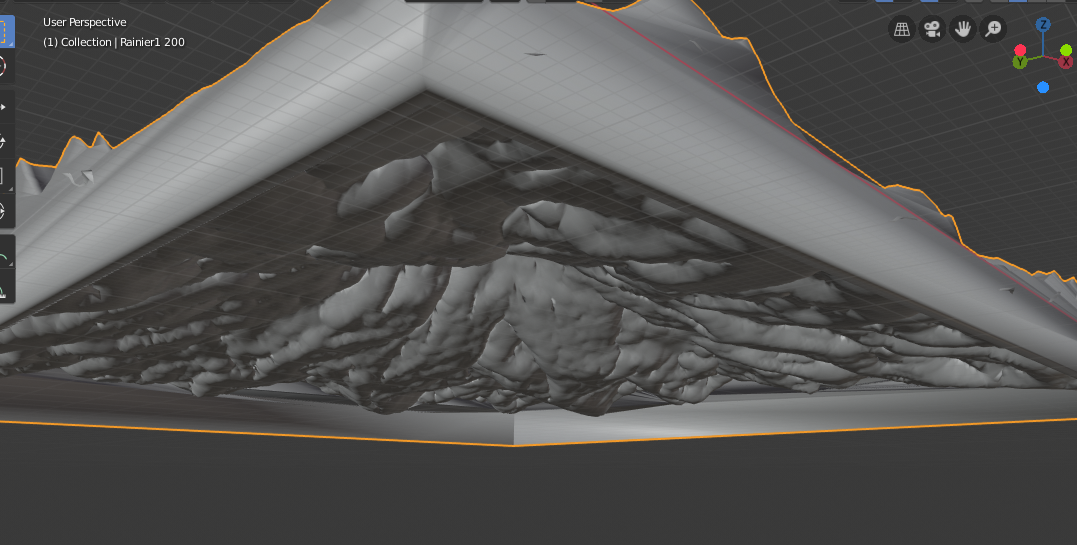
Then you export this model as a .STL and send it off to your 3D printer.
3D Printing Your Model
TL;DR: Do your prototyping cheap and quick with FDM ($) printing. When you’re ready for a high quality model, move to SLA printing ($$)
Types Of 3D Print Technology
Since I was using this 3D print for a bronze cast mold, I didn’t care about 1) color 2) strength, or 3) weight.
What I did care about was the detail of the printed model. Specifically, I didn't want layer lines showing which is a common “feature” of most 3D prints.
The two main types of 3D printing I use: Fused Deposition Modeling (FDM) and Stereolithography printing (SLA).
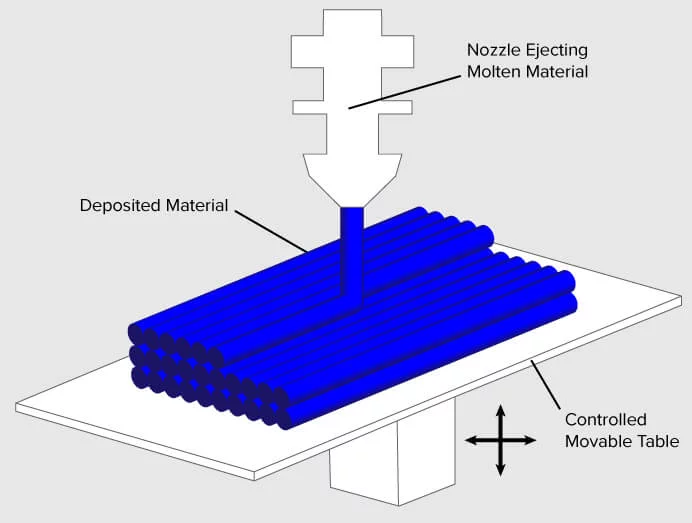
FDM 3D printing is what you traditionally see in the news.
Hot melted plastic comes out of a tip, or extruder, and slowly builds up a model layer by layer. These prints usually have very prominent layer lines, but it’s cheap, quick, and you can print big models.
Here’s a picture of an FDM printer in action:
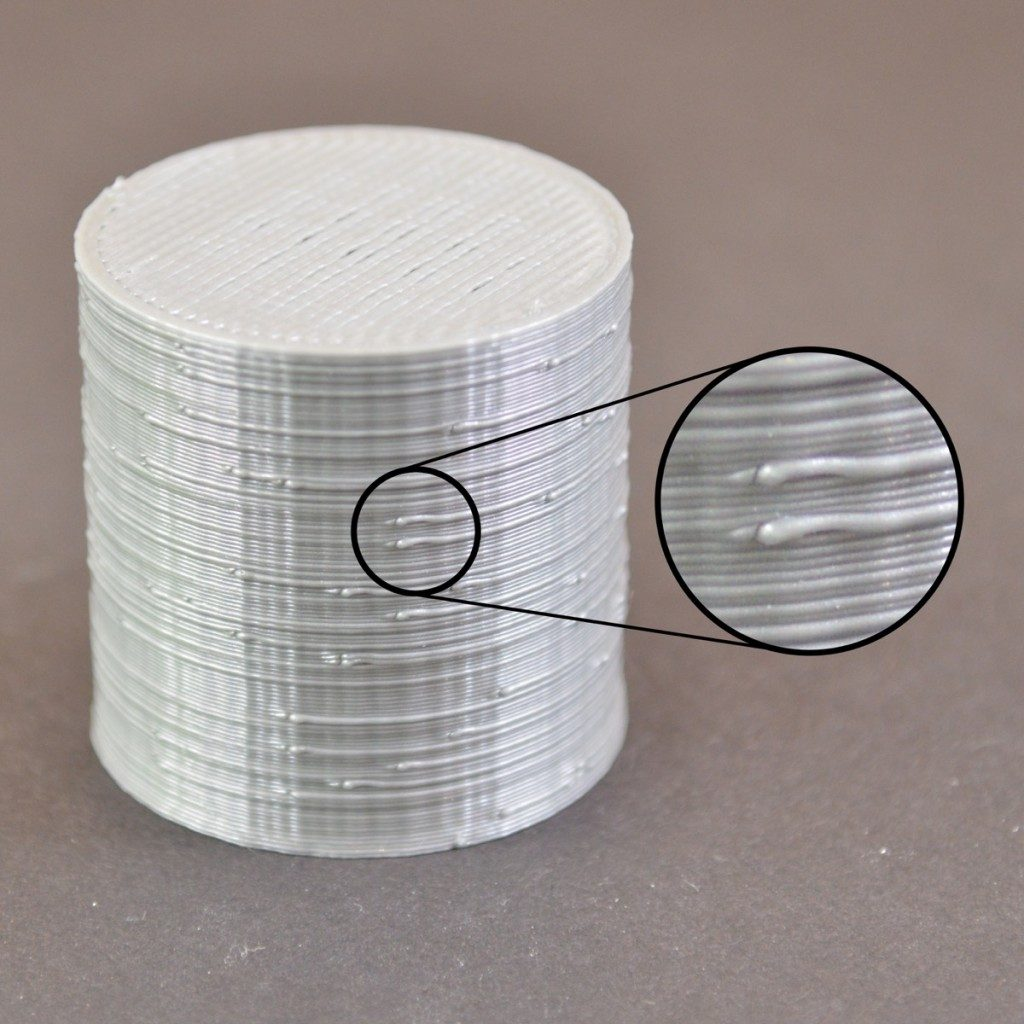
The downside with FDM printers are the layer lines. Check out an exaggerated visual of a printer below.
In real life these layer lines look like horizontal notches on your model.
FDM printers are great for prototyping quickly. I almost picked one up myself but opted to hire out this problem.
I outsourced because I didn’t want to:
Deal with printer maintenance
Keep it in my small SF apartment
And ultimately, I didn’t want to learn how to be a practitioner of 3D printing. I wanted to learn how to push a product to market.
I also wanted a realistic look, so I tried as hard as possible to remove layer lines. You can do this by sanding down your FDM print, but that’s a huge pain.
I opted for a different type of 3D printing which led me to Stereolithography printing or SLA. This is when you use lasers to harden resin that sits in a pool or vat.
“I have one simple request, and that’s to have sharks with frickin laser beams attached to their heads!”
This process is more expensive, but the detail is incredible. Here’s a gif of this process in action. Check out how your model comes out of the liquid from nowhere. Pretty sweet.
3D Printing Iterations
For my Lake Tahoe Bronze, I started prototyping with FDM, and then moved on to SLA printing for the final product.
Originally, I searched for product development groups but they wanted to charge me for services I didn’t need yet. Since this whole thing was an experiment in the first place, there was no need to spend lots of money. I just wanted to outsource just the printing part.
I ended up emailing 40+ vendors to try and find a good partner and went with a small shop on the east coast. The engineers were great, offered to help me with some modeling, and jumped on the phone with me whenever I needed.
Here’s the series of 3D prints I did for the Lake Tahoe Bronze:
V1 Proof Of Concept - This was done in Bali at a Bisamake Makerspace. It cost $17 to make
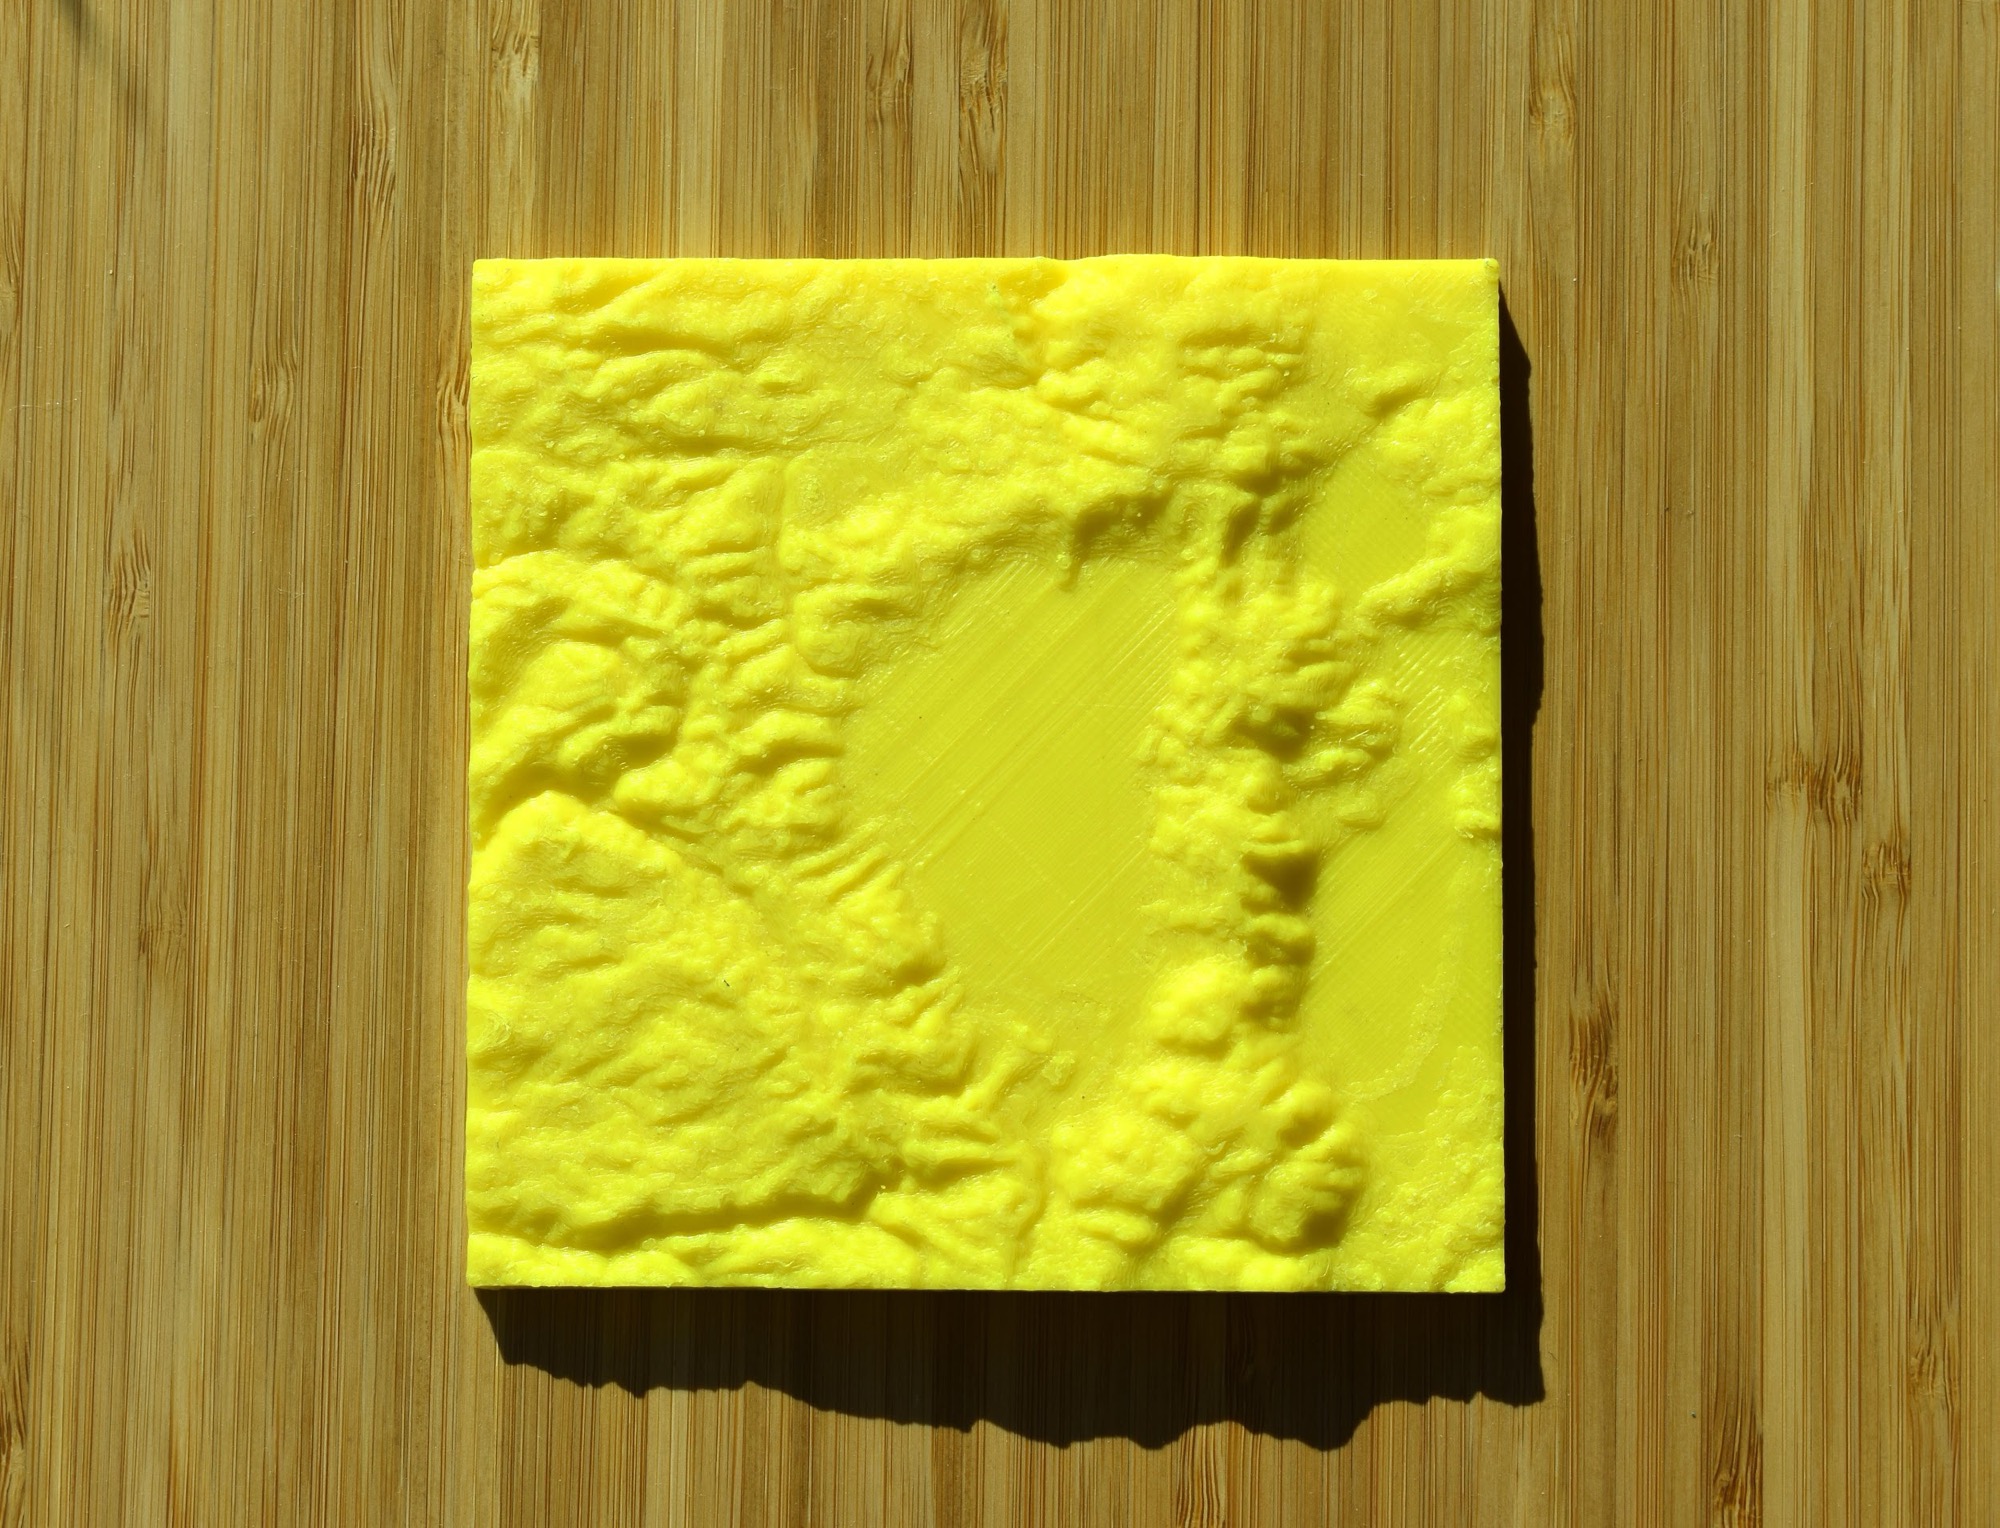
V2 - Larger and higher definition FDM print. It cost $40 from 3D Hubs
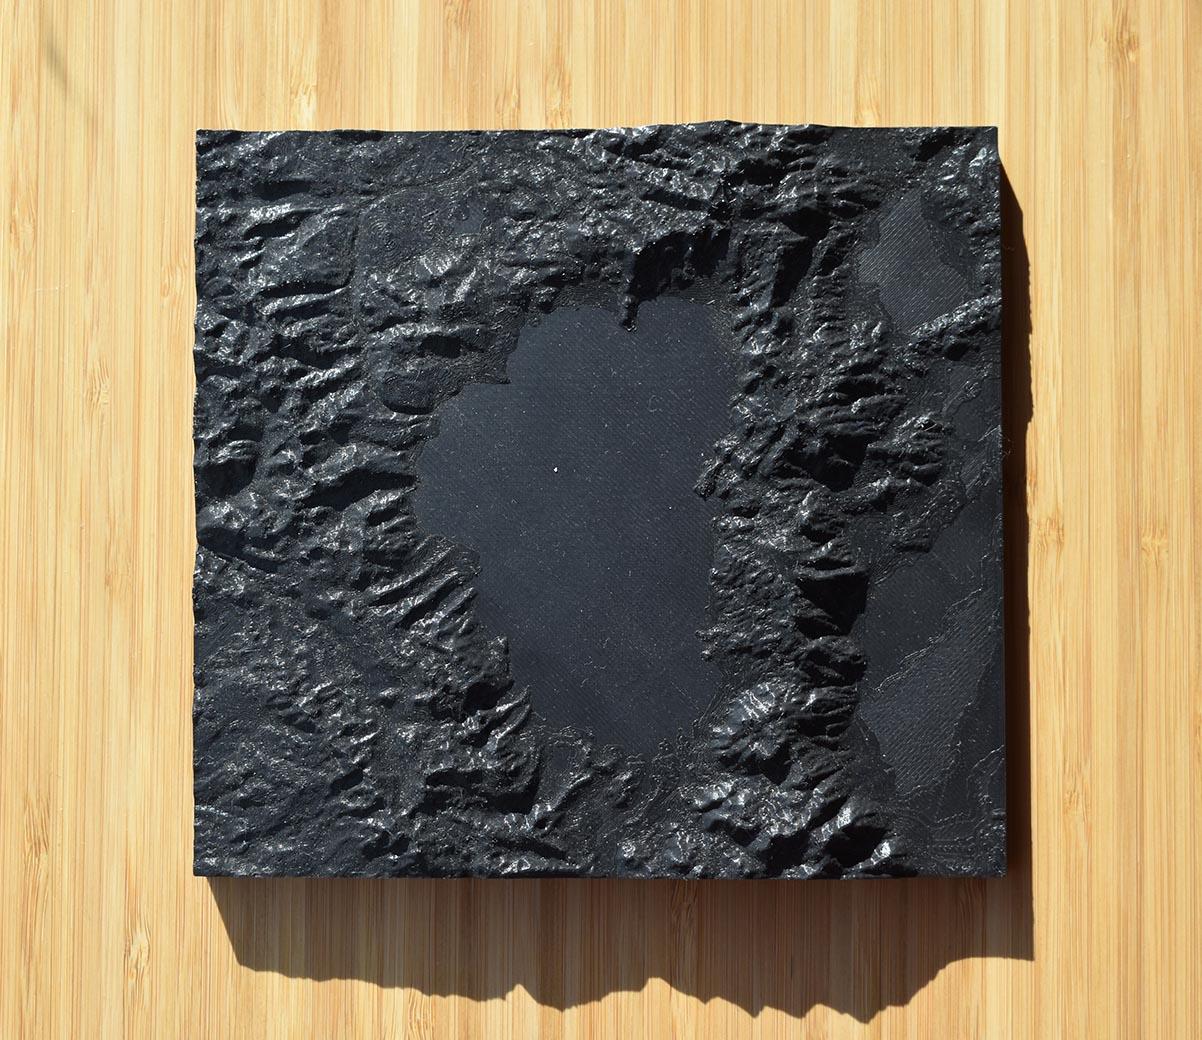
V2.5 - I tested CNC’ing a Lake Tahoe. It had a lot of layer lines and we ultimately couldn’t go with it. It was fun learning about the process though!
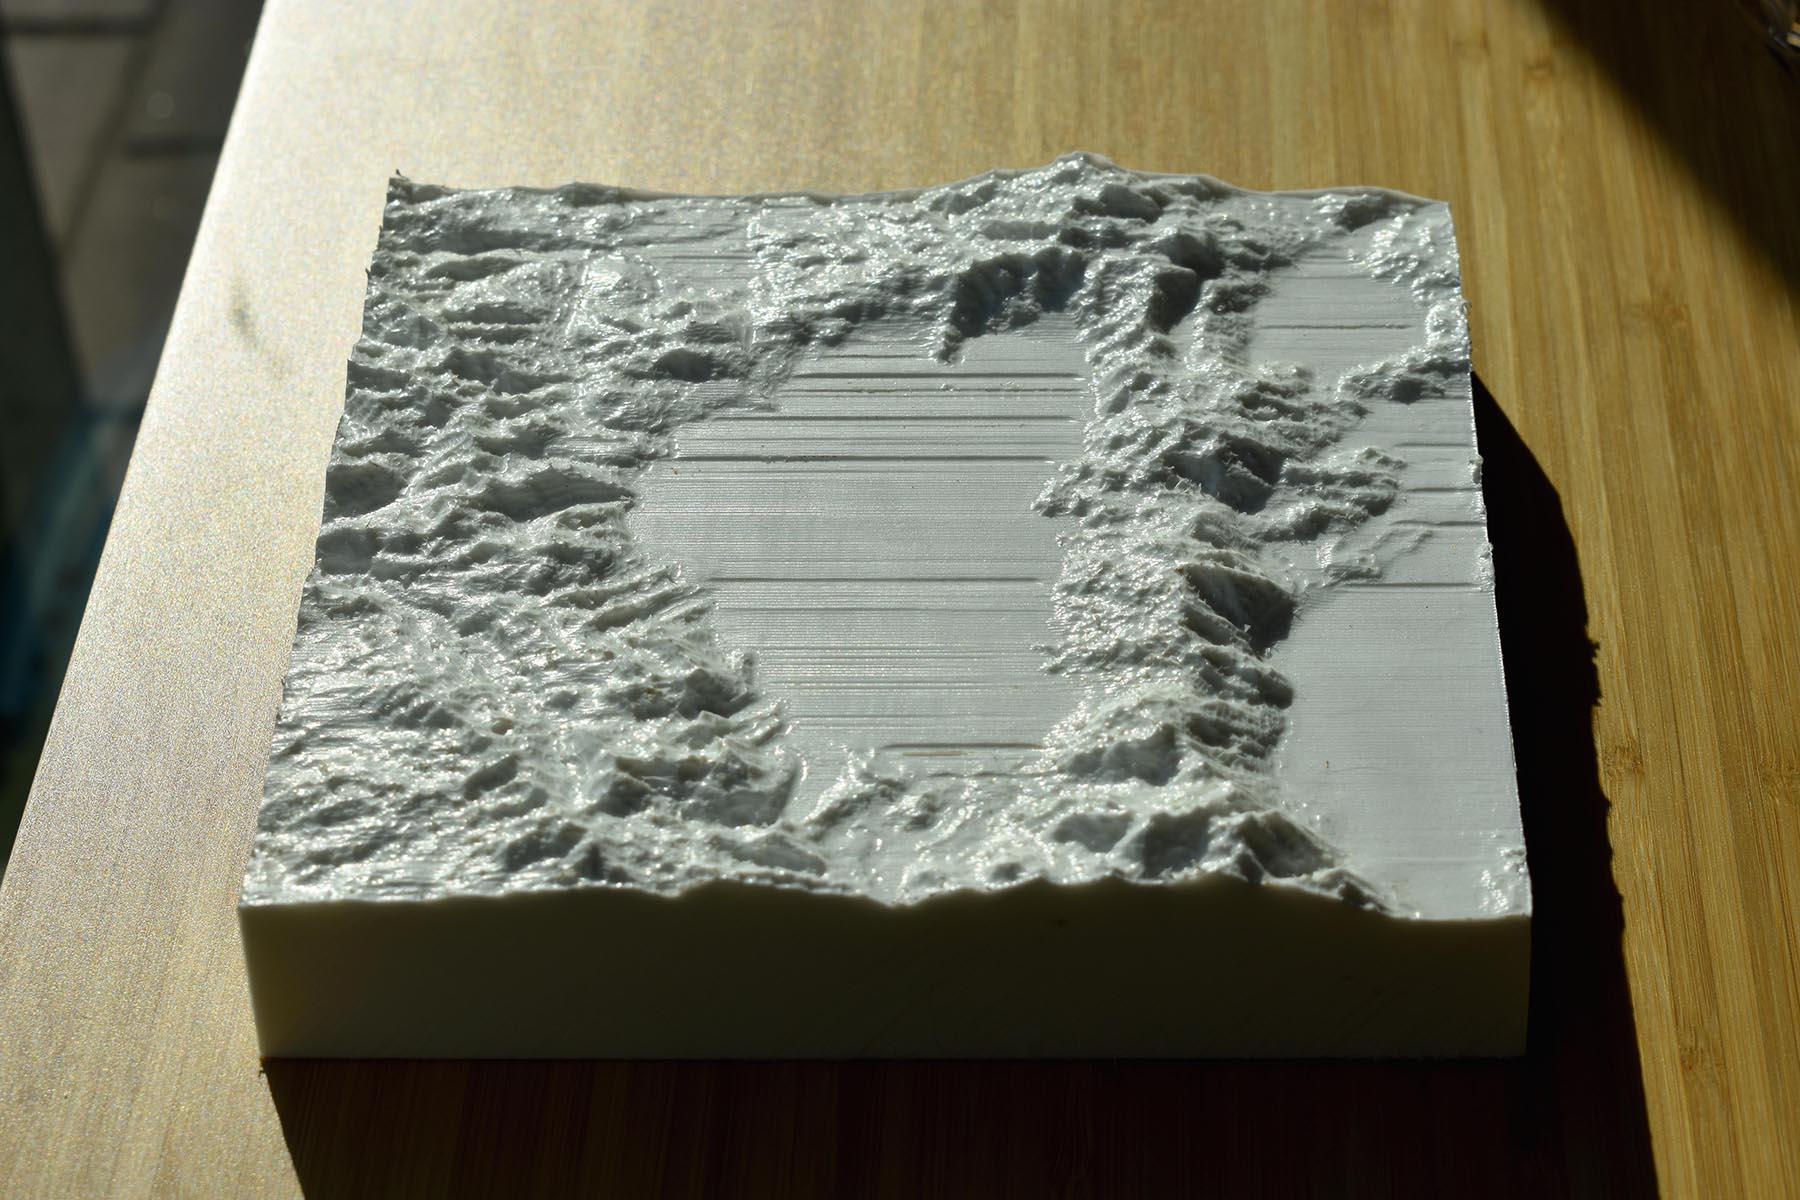
V3 - Here’s a shot of a print that had a defect. Due to the layer lines and print error, I wasn’t able to use this one. Money lost - the cost of prototyping.
V4 - Final 3D print. No layer lines and smooth, ~$60. I ordered 2, one for me, one for the foundry.
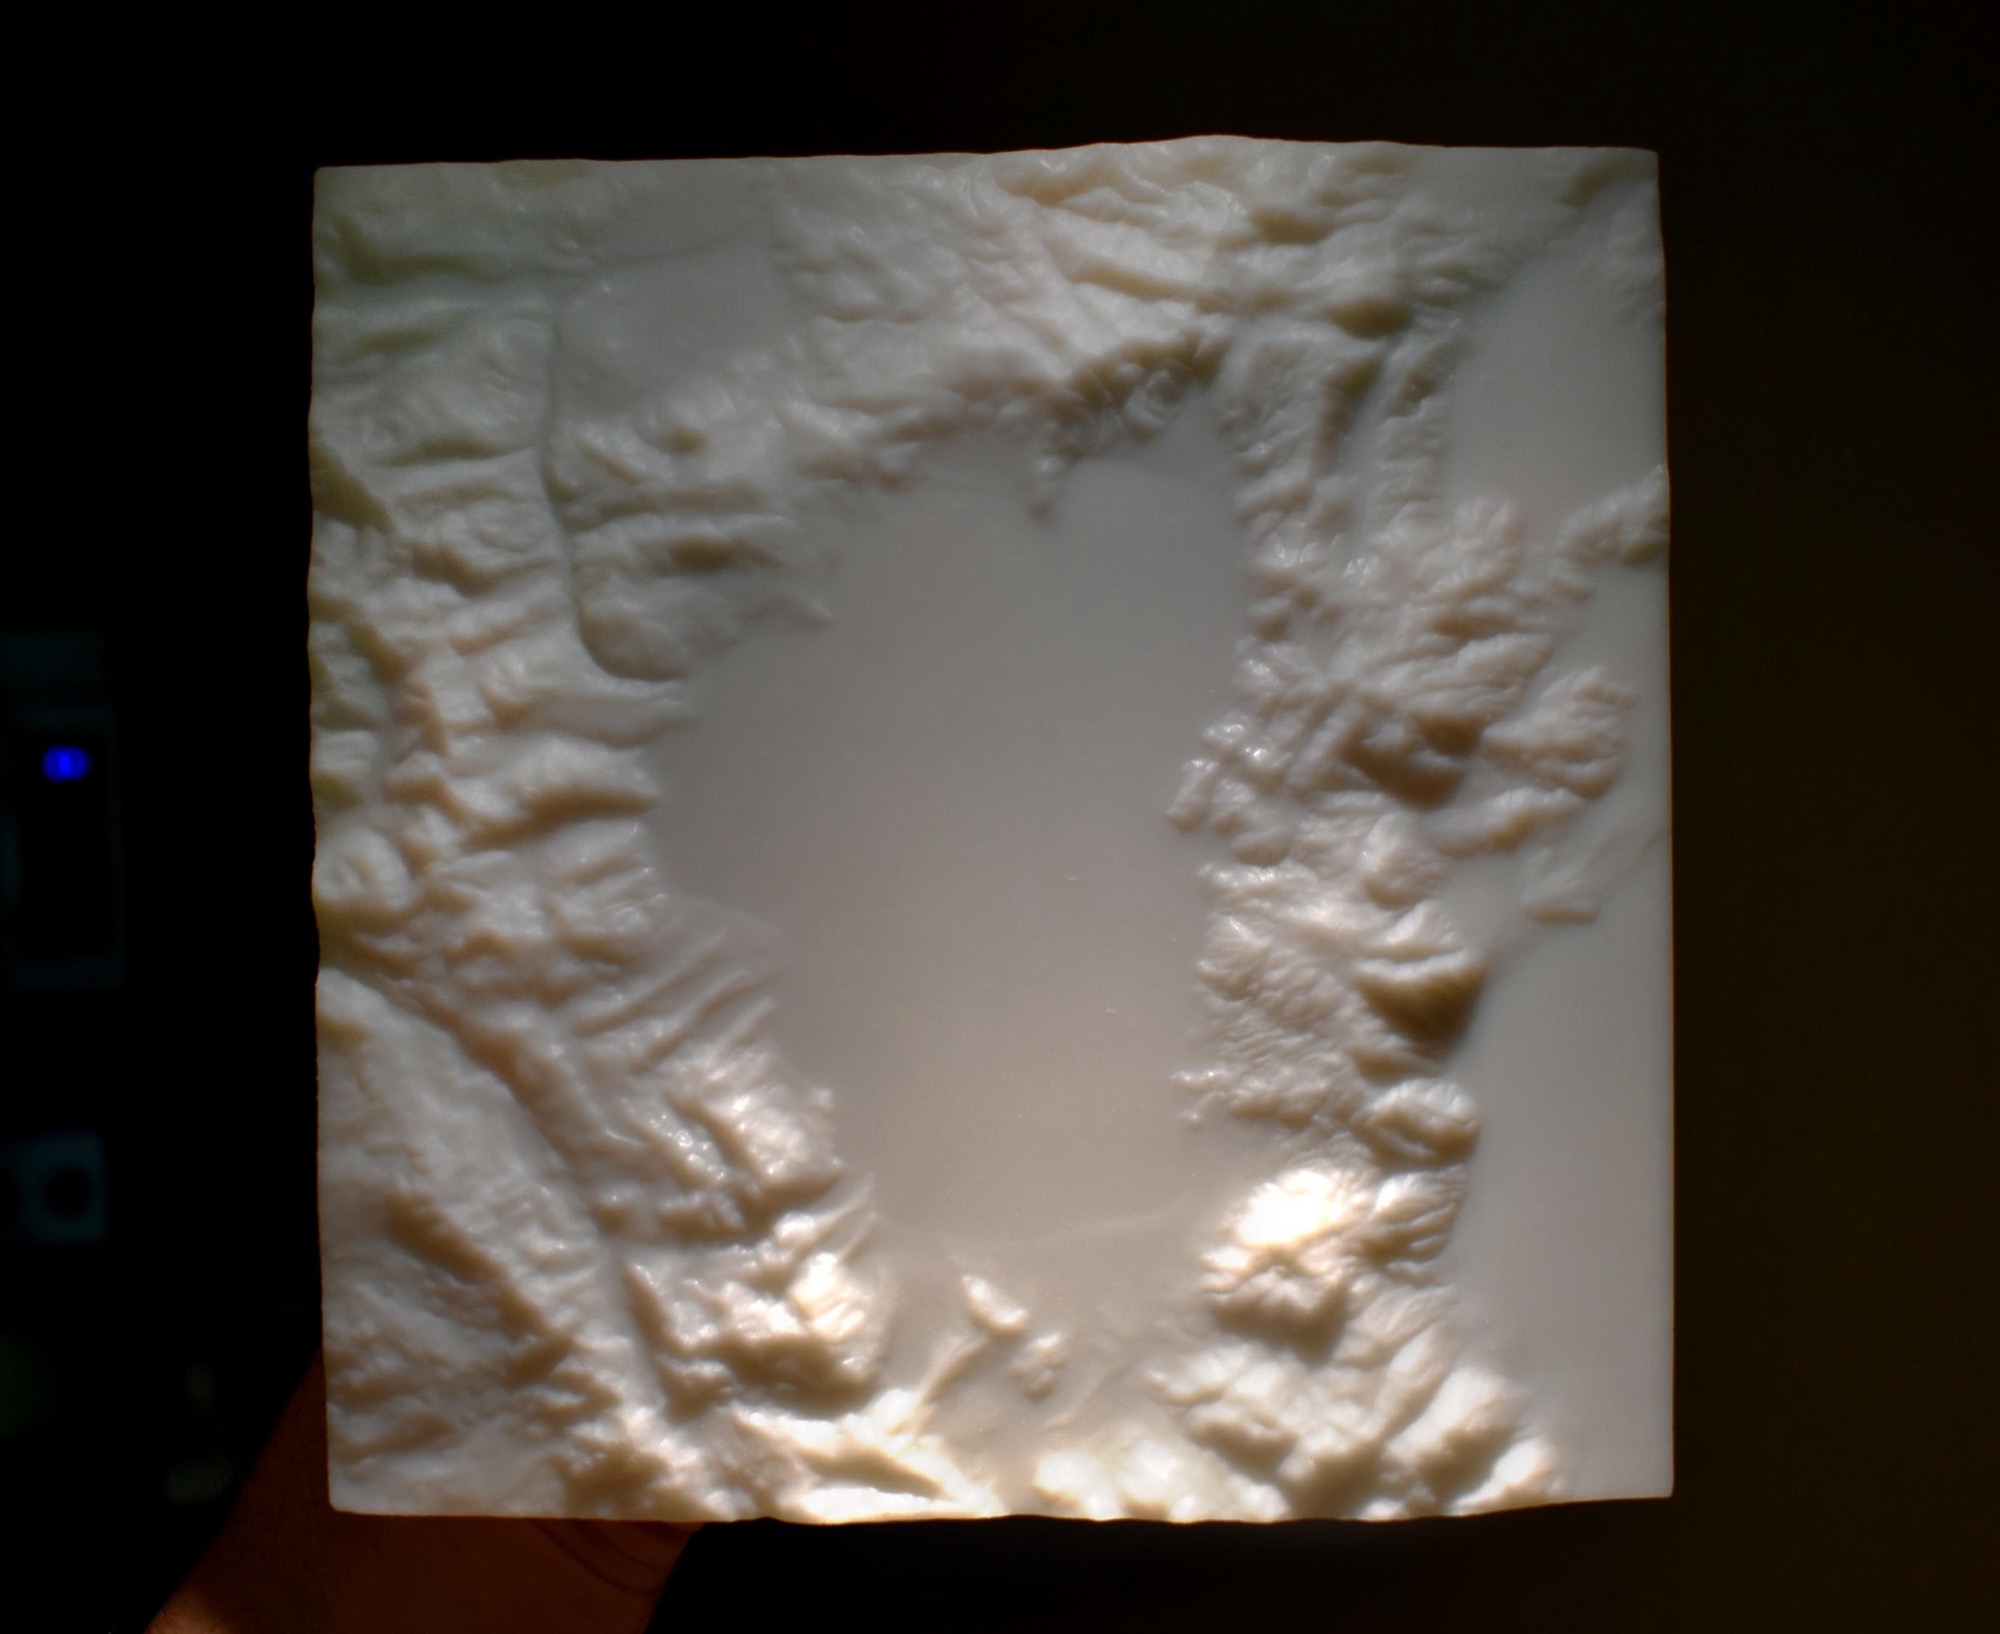
Now it was time to move onto the casting process and work with a foundry, or a factory that casts metal.
Casting Your 3D Print
TL;DR: Find a foundry who will make a mold of your print. Then order as many bronze casts as you want.
What I wanted from my finished product:
A heavy weight feel
A elevated quality look
An aura of durability
All the detail from the 3D print captured
I looked up different types of casting processes such as Lost Wax, Sand Casting, and Die Casting.
Sand Casting, (pouring metal into sand molds) is good for parts you don’t need a smooth finish on, like car engine parts
Die Casting (stamping metal between metal) is pretty expensive to start up and good for mass quantity (like airplane parts).
Lost Wax, (making a cast from a wax model) while a bit expensive per unit, gives you a lot of flexibility. Lost Wax is most commonly used for art pieces and bronze sculptures.
We ended up going with Lost Wax because:
It’s cheaper at lower quantities
It’ll capture the detail I needed it to from the 3D print
Bronze is a common Lost Wax use case.
In fact, Lost Wax captures so much detail that a rep from a foundry told me that it would “get the fingerprints from your mold.” Sounds good to me.
I was happy with bronze (vs steel, aluminum, or tin) because I would get the color, weight, and classic vibe that I was going for.
Finding A Foundry
In order to find a foundry, I hounded google and started sending out emails. About half way through I found a large list of California Foundries.
I briefly considered going to China to try and do these bronzes, but there are a couple problems:
I had no idea what I was doing and it is tough dealing with the lack of knowledge and a language barrier
The iteration time was too slow for me. I didn’t want to wait multiple weeks without getting an update
Shipping costs were going to be a pain
I found a foundry in Northern California who worked out. I liked this group because I could go to their shop, shake their hands, and get a first hand account of what the process looked like.
Lost Wax Casting
The first step of the Lost Wax casting process is making a “negative” mold from your 3D print.
Here is the mold that the foundry made for me of my Lake Tahoe. This one mold had a fixed cost of $100-$200 to make but will produce 100s of Lake Tahoes.
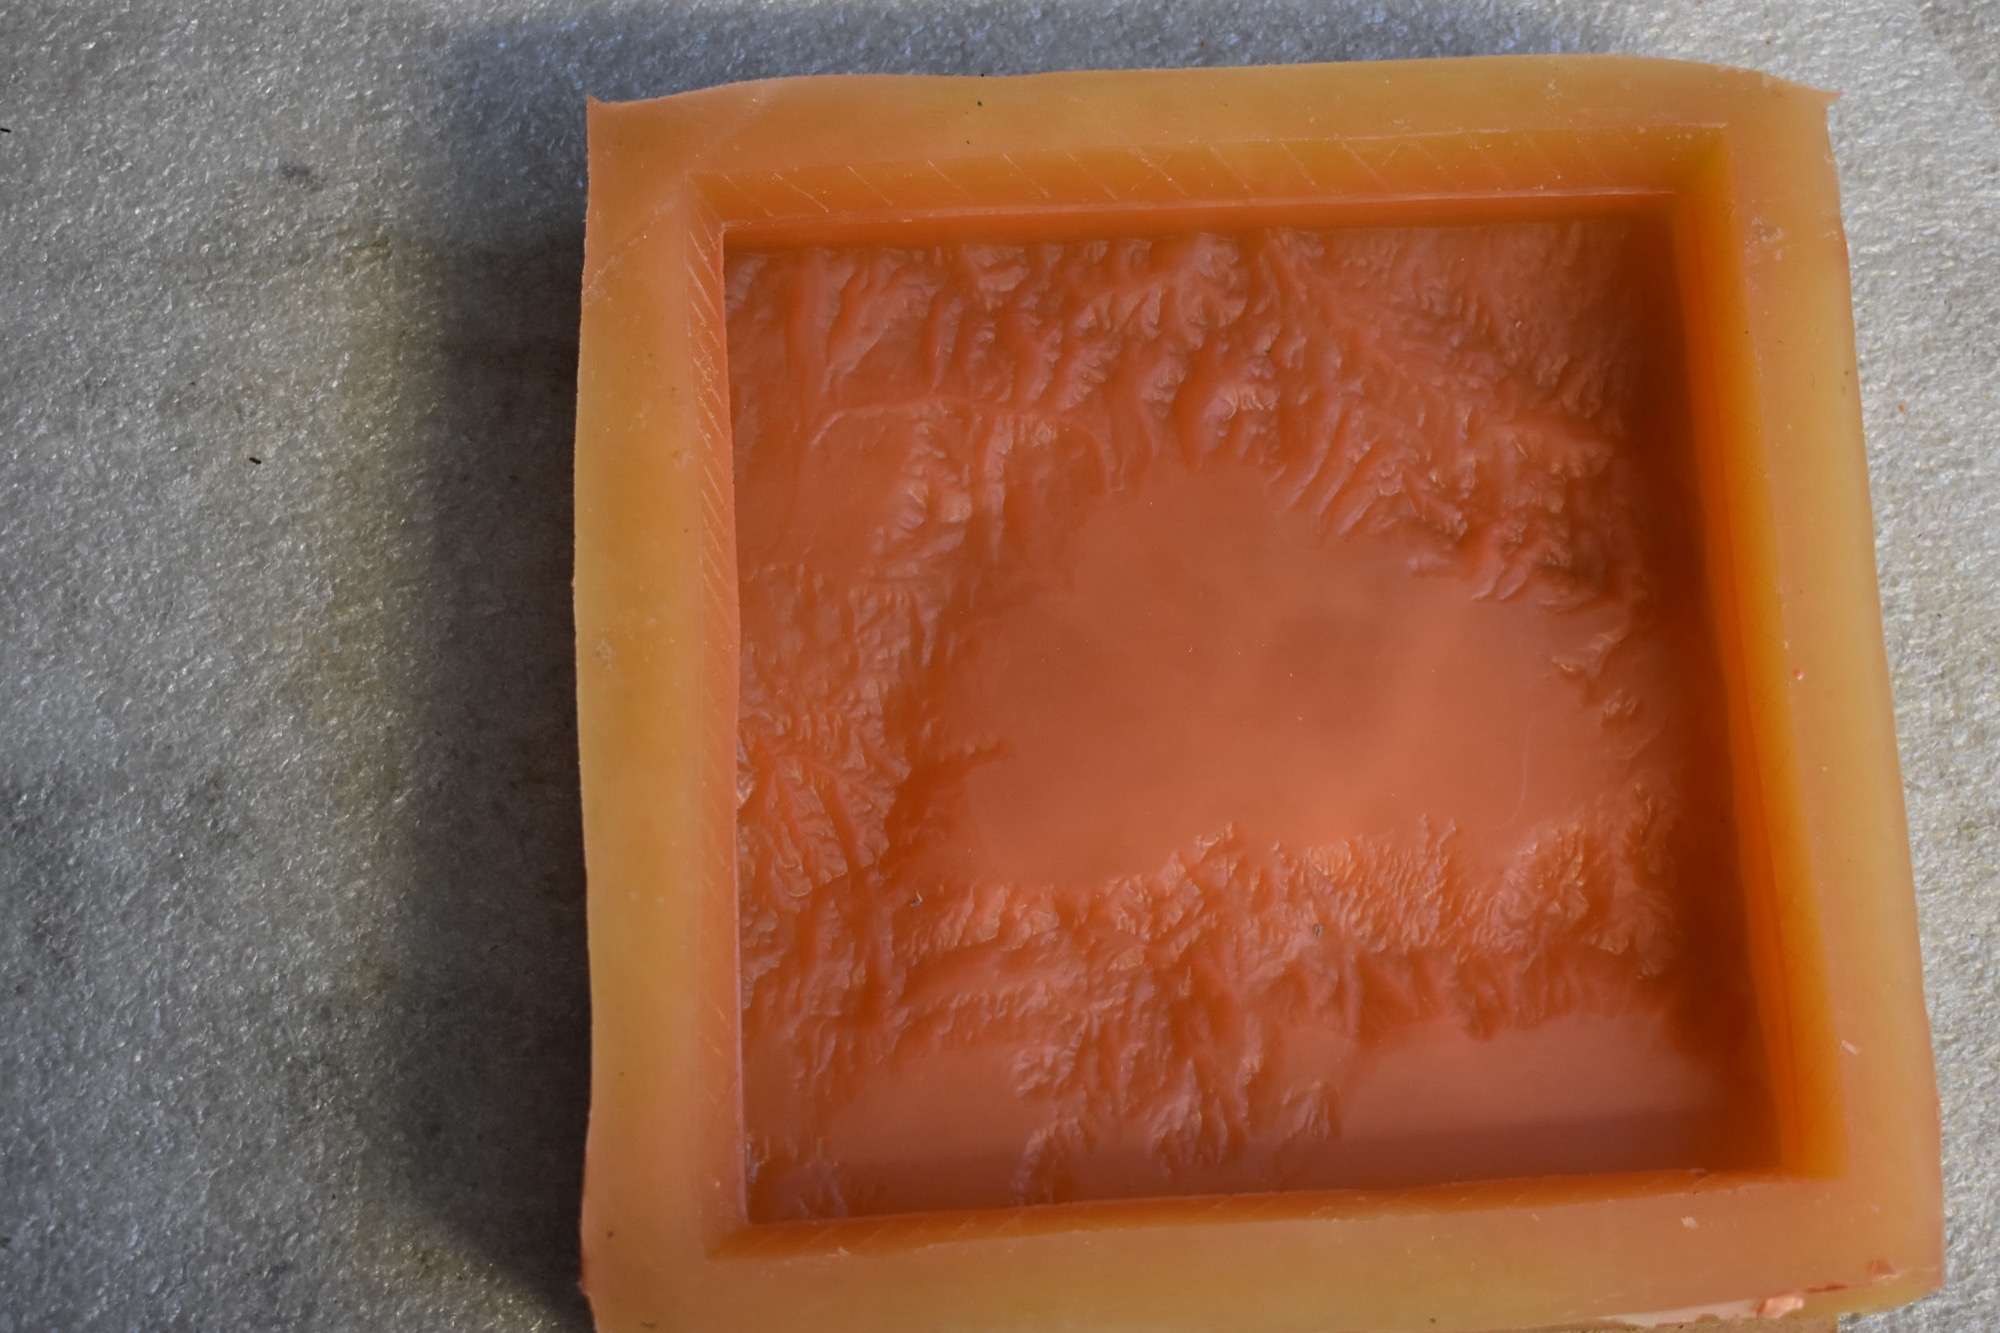
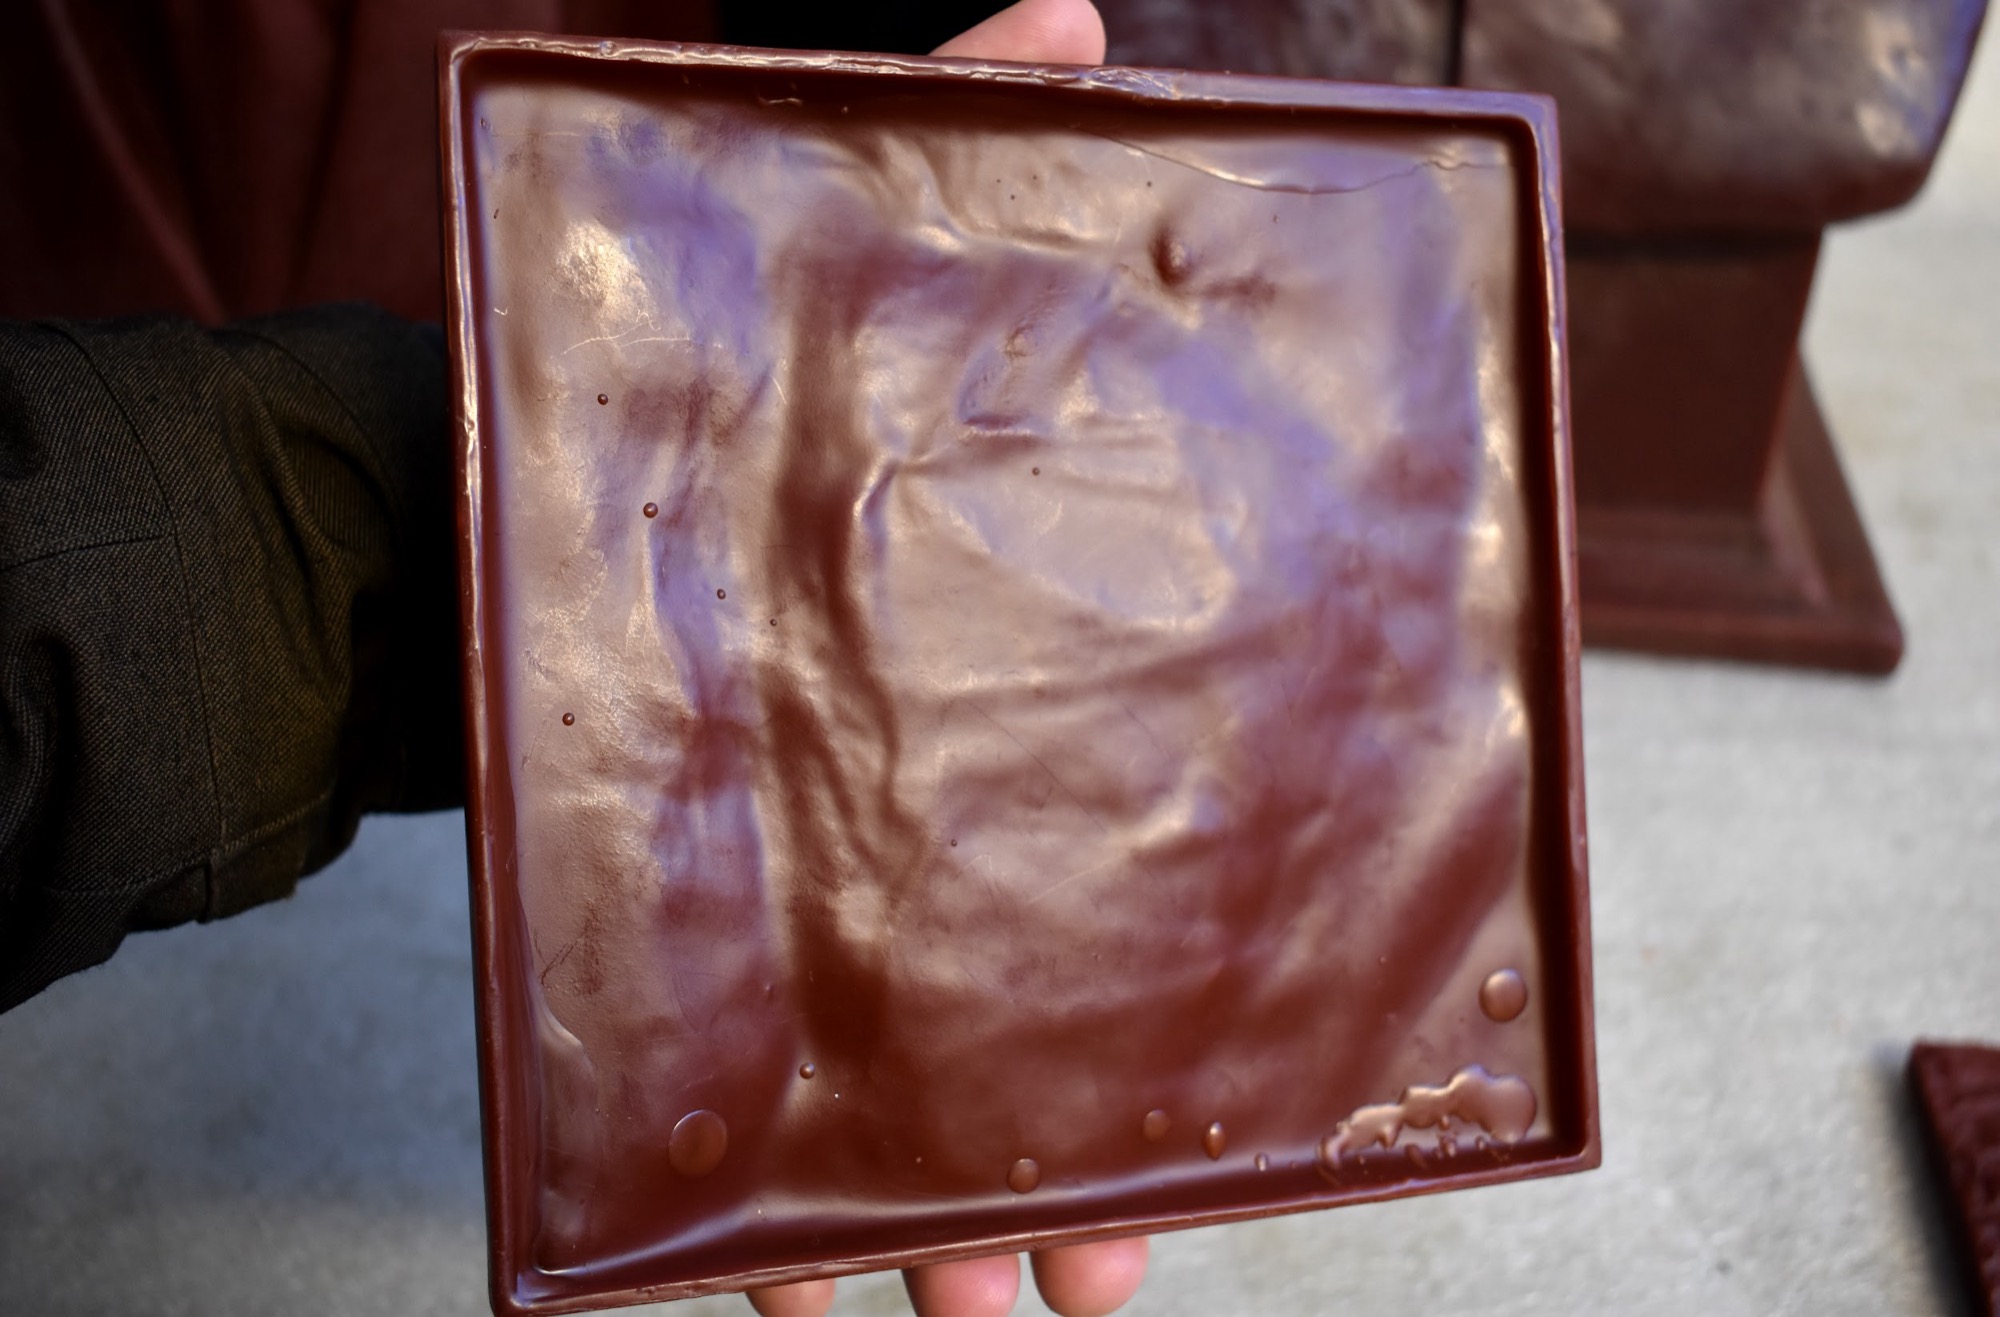
The next step is producing wax positives from this mold.
These waxes will eventually be encased in a ceramic shell before bronze is poured in. You make a new wax for each of the bronzes you order.
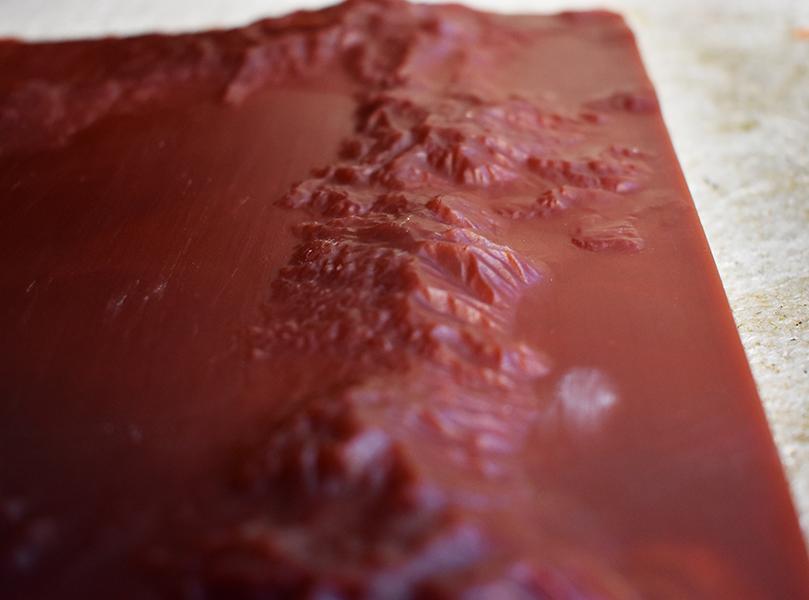
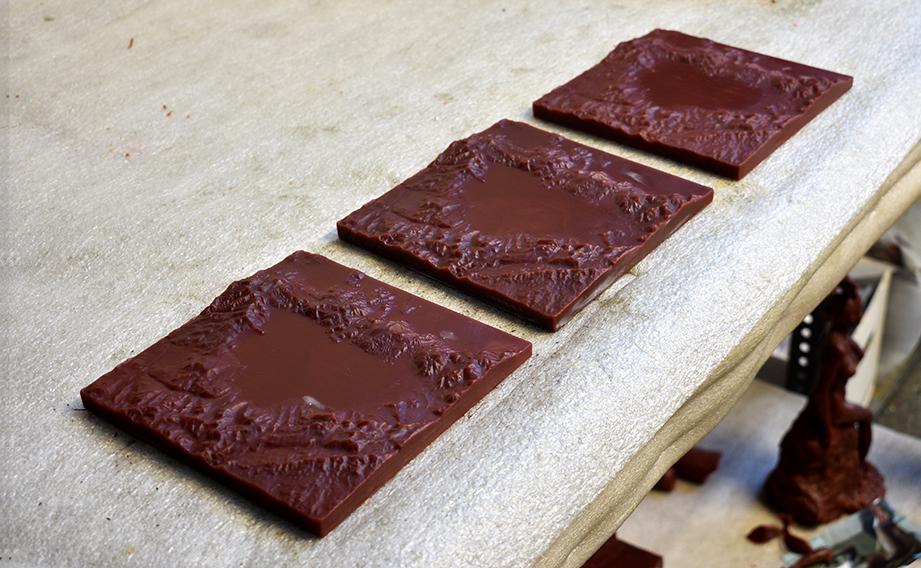
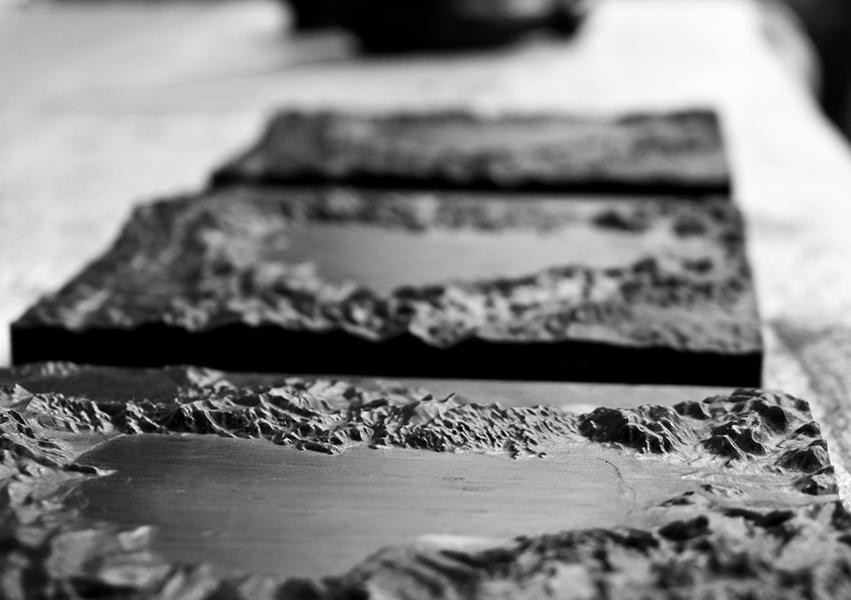
Because I ordered three bronzes to start, I got three waxes. Here is a picture of the three waxes during the “wax check” to make sure they were good to go. The bronzes will look exactly like their original wax counterpart, so it is important they are perfect. Any changes at this stage will be done by hand to each wax.
This foundry usually works with artists and they asked me if I wanted to sign the waxes, so that my signature would show up in the final bronze product. They told me most people do sign, but I chose not to. I thought of this as a product - the focus is on the bronze, not me.
After the waxes are done, they will have sprues (air vents for the bronze to flow through) added and then encased in a ceramic shell. I don’t have Tahoes pictures, but this is what the process looks like.

The Lake Tahoe Wax would be somewhere in that shell.
After the wax is encased in the shell, the wax is then melted out. What you have left is a cavity in the shape of my Lake Tahoe 3D print that is ready for a bronze pour.

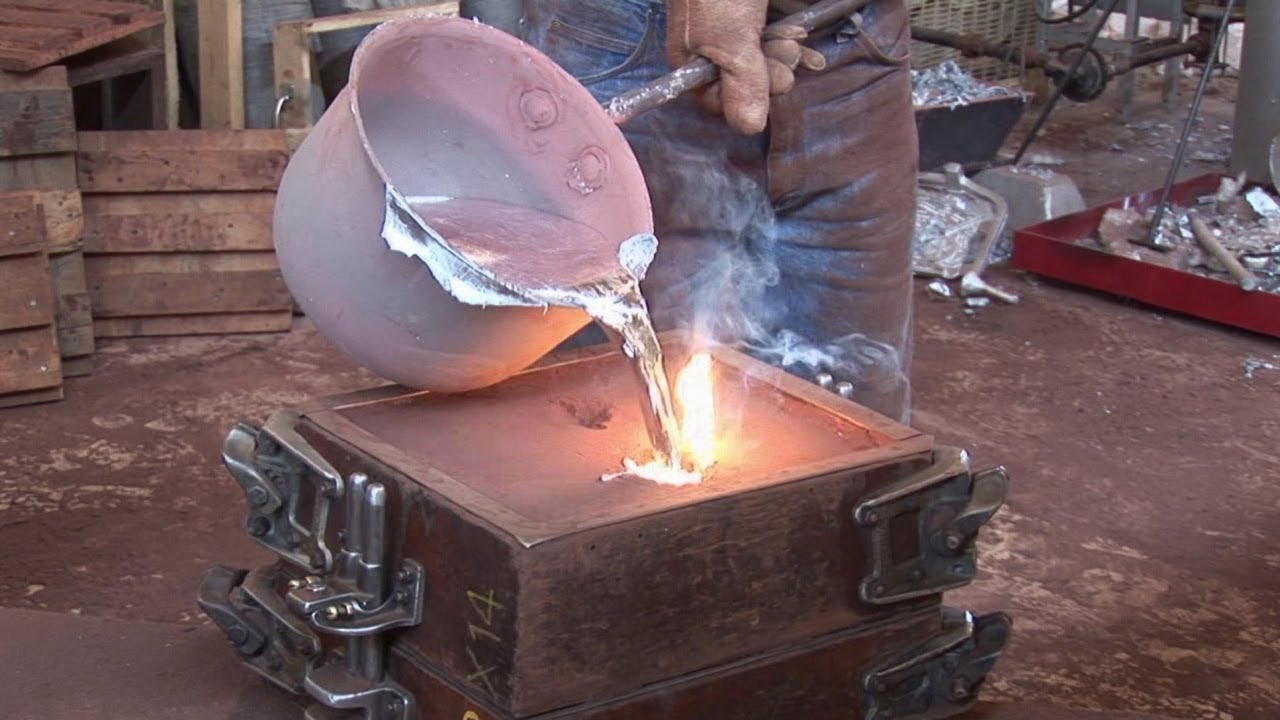
Bronze is then poured into the shell and allowed to cool. The result is a bronze replica of your 3D print.
After some metal working clean up (cutting off the sprues, any finishing touches), you are ready for your patina, or color that will finish the bronze.
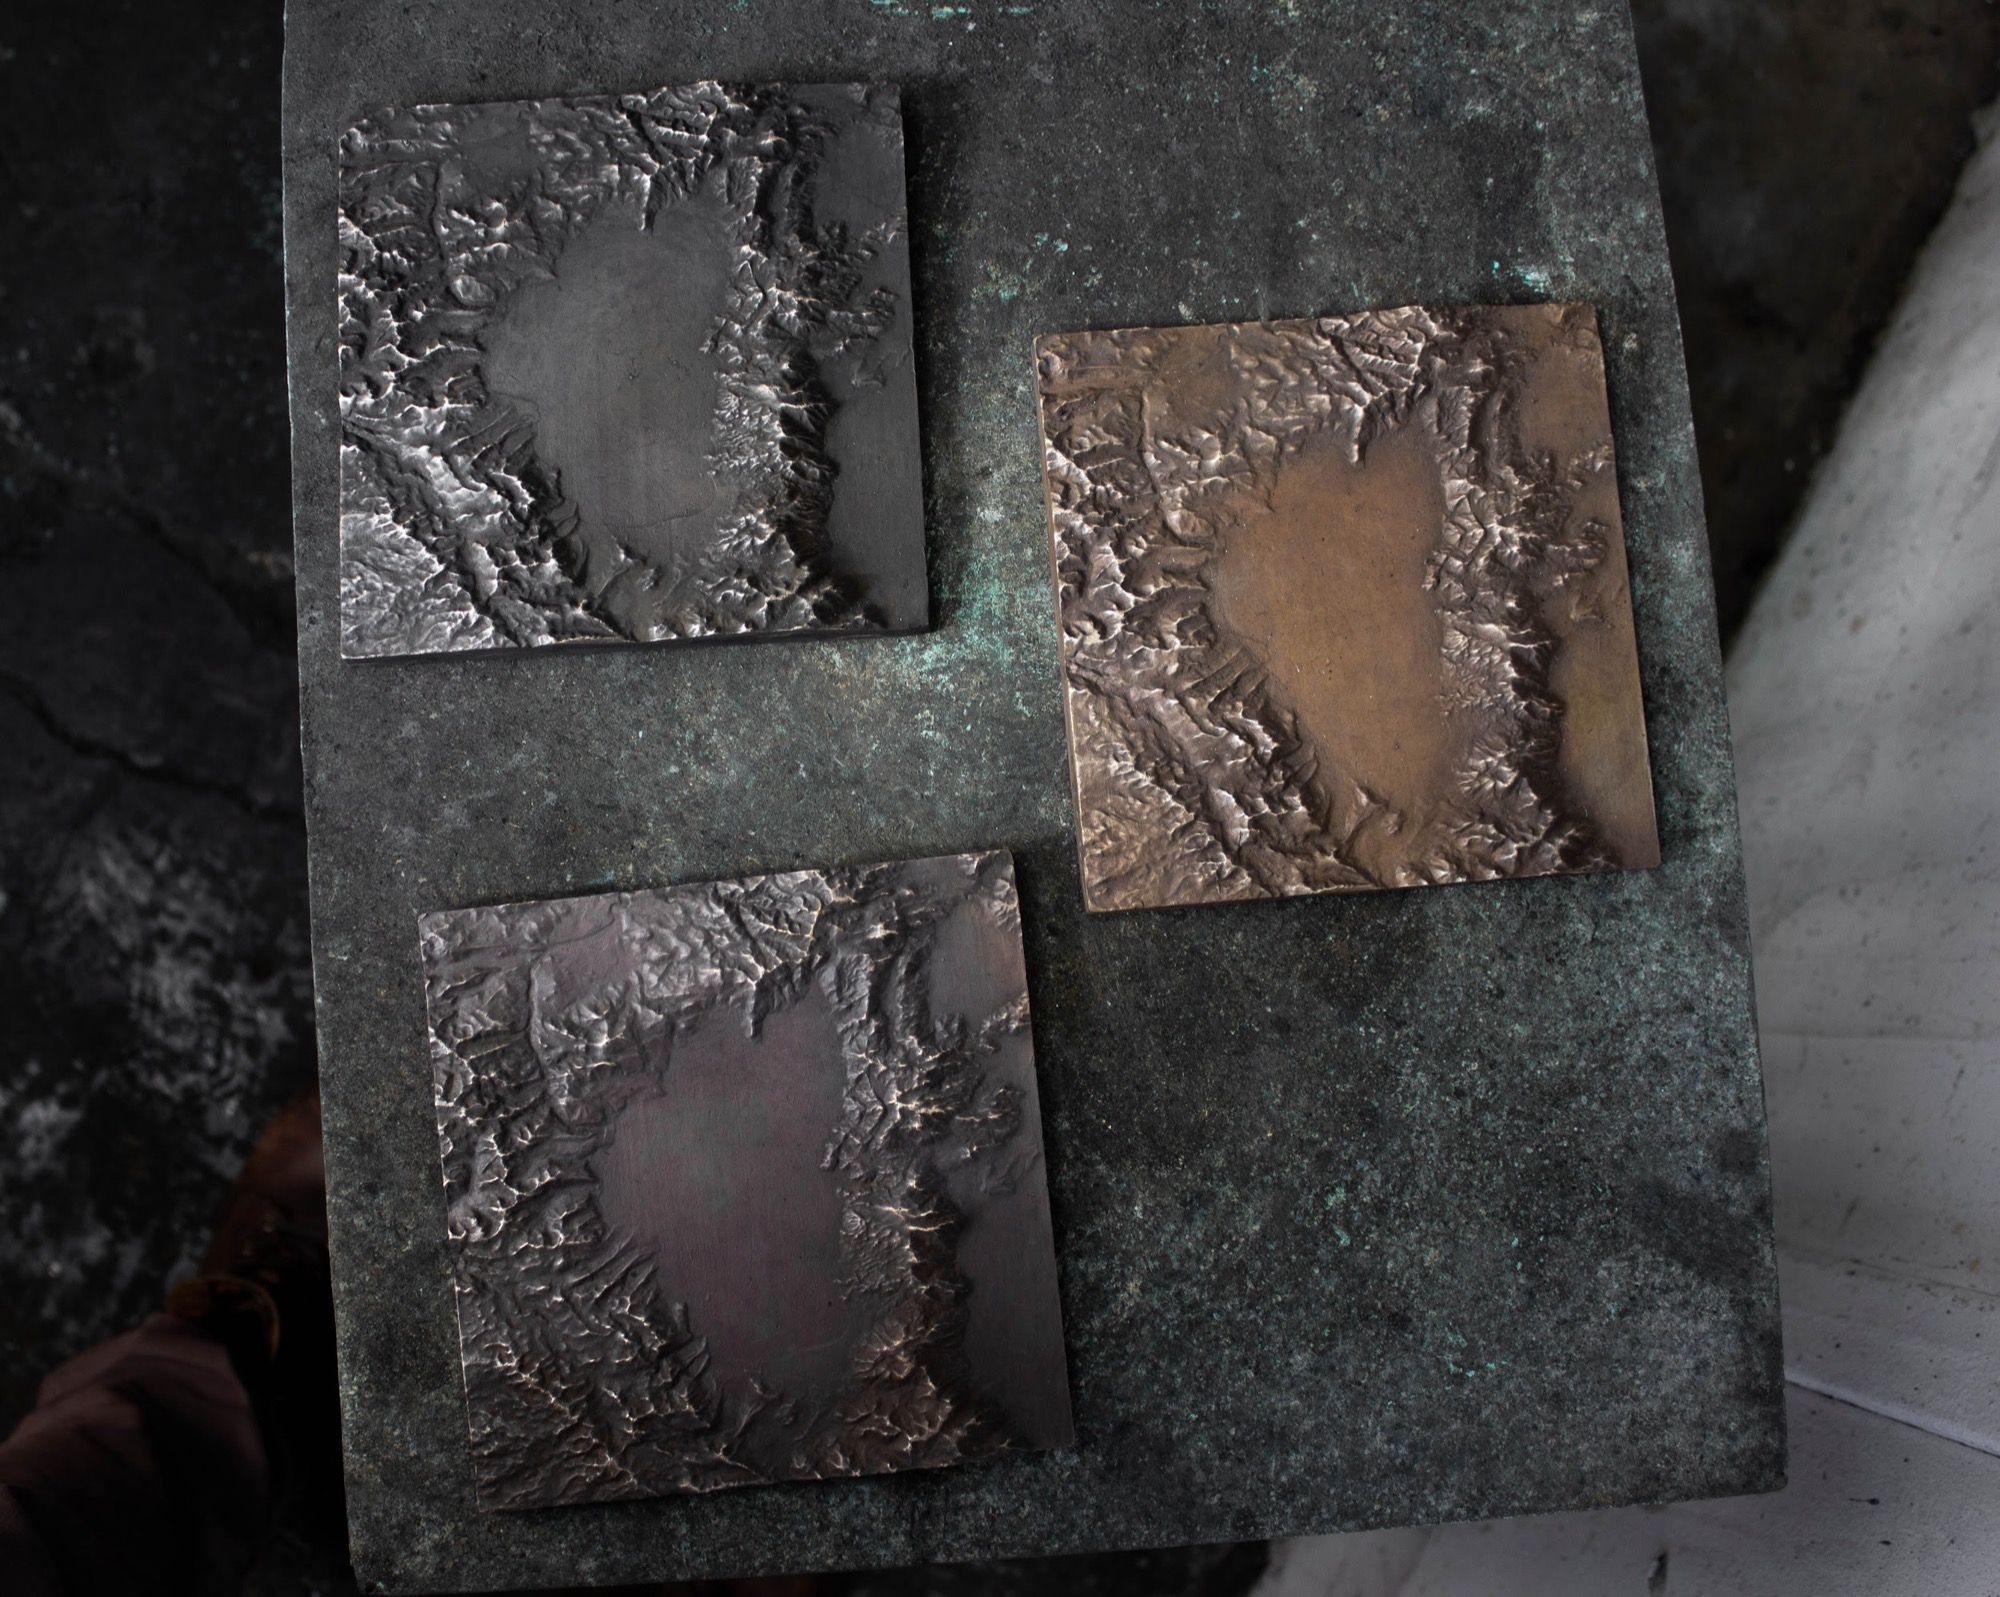
Here are the 3 Lake Tahoe Bronzes before patina. They are all the same color (since they are fresh from the bronze pour) and we picked what we want them to look like.
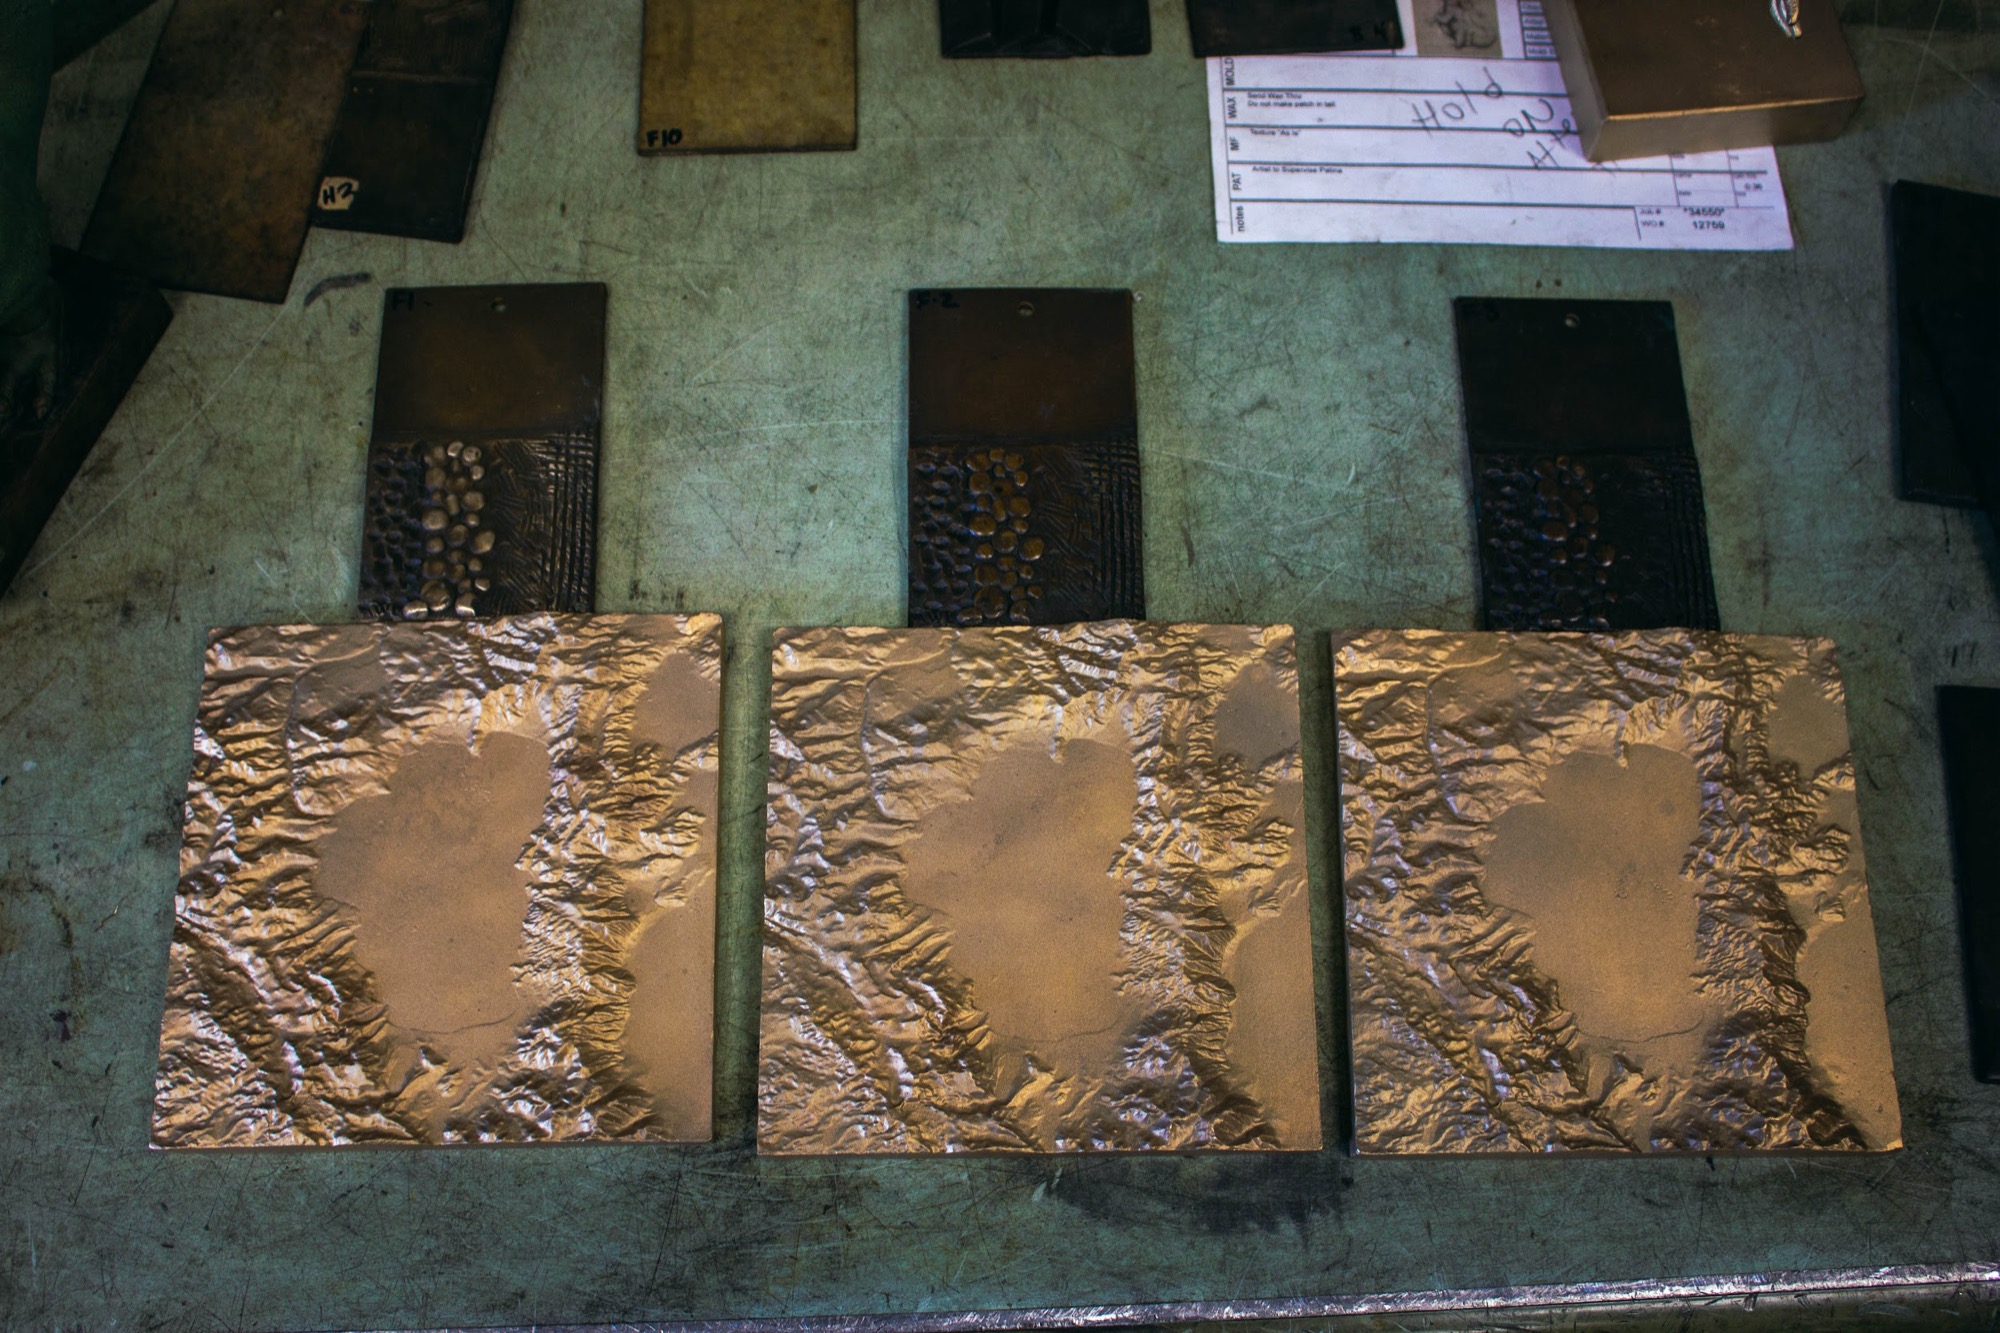
I opted for 3 different colors so I could see:
What I liked the best
Most importantly - What the market liked the best
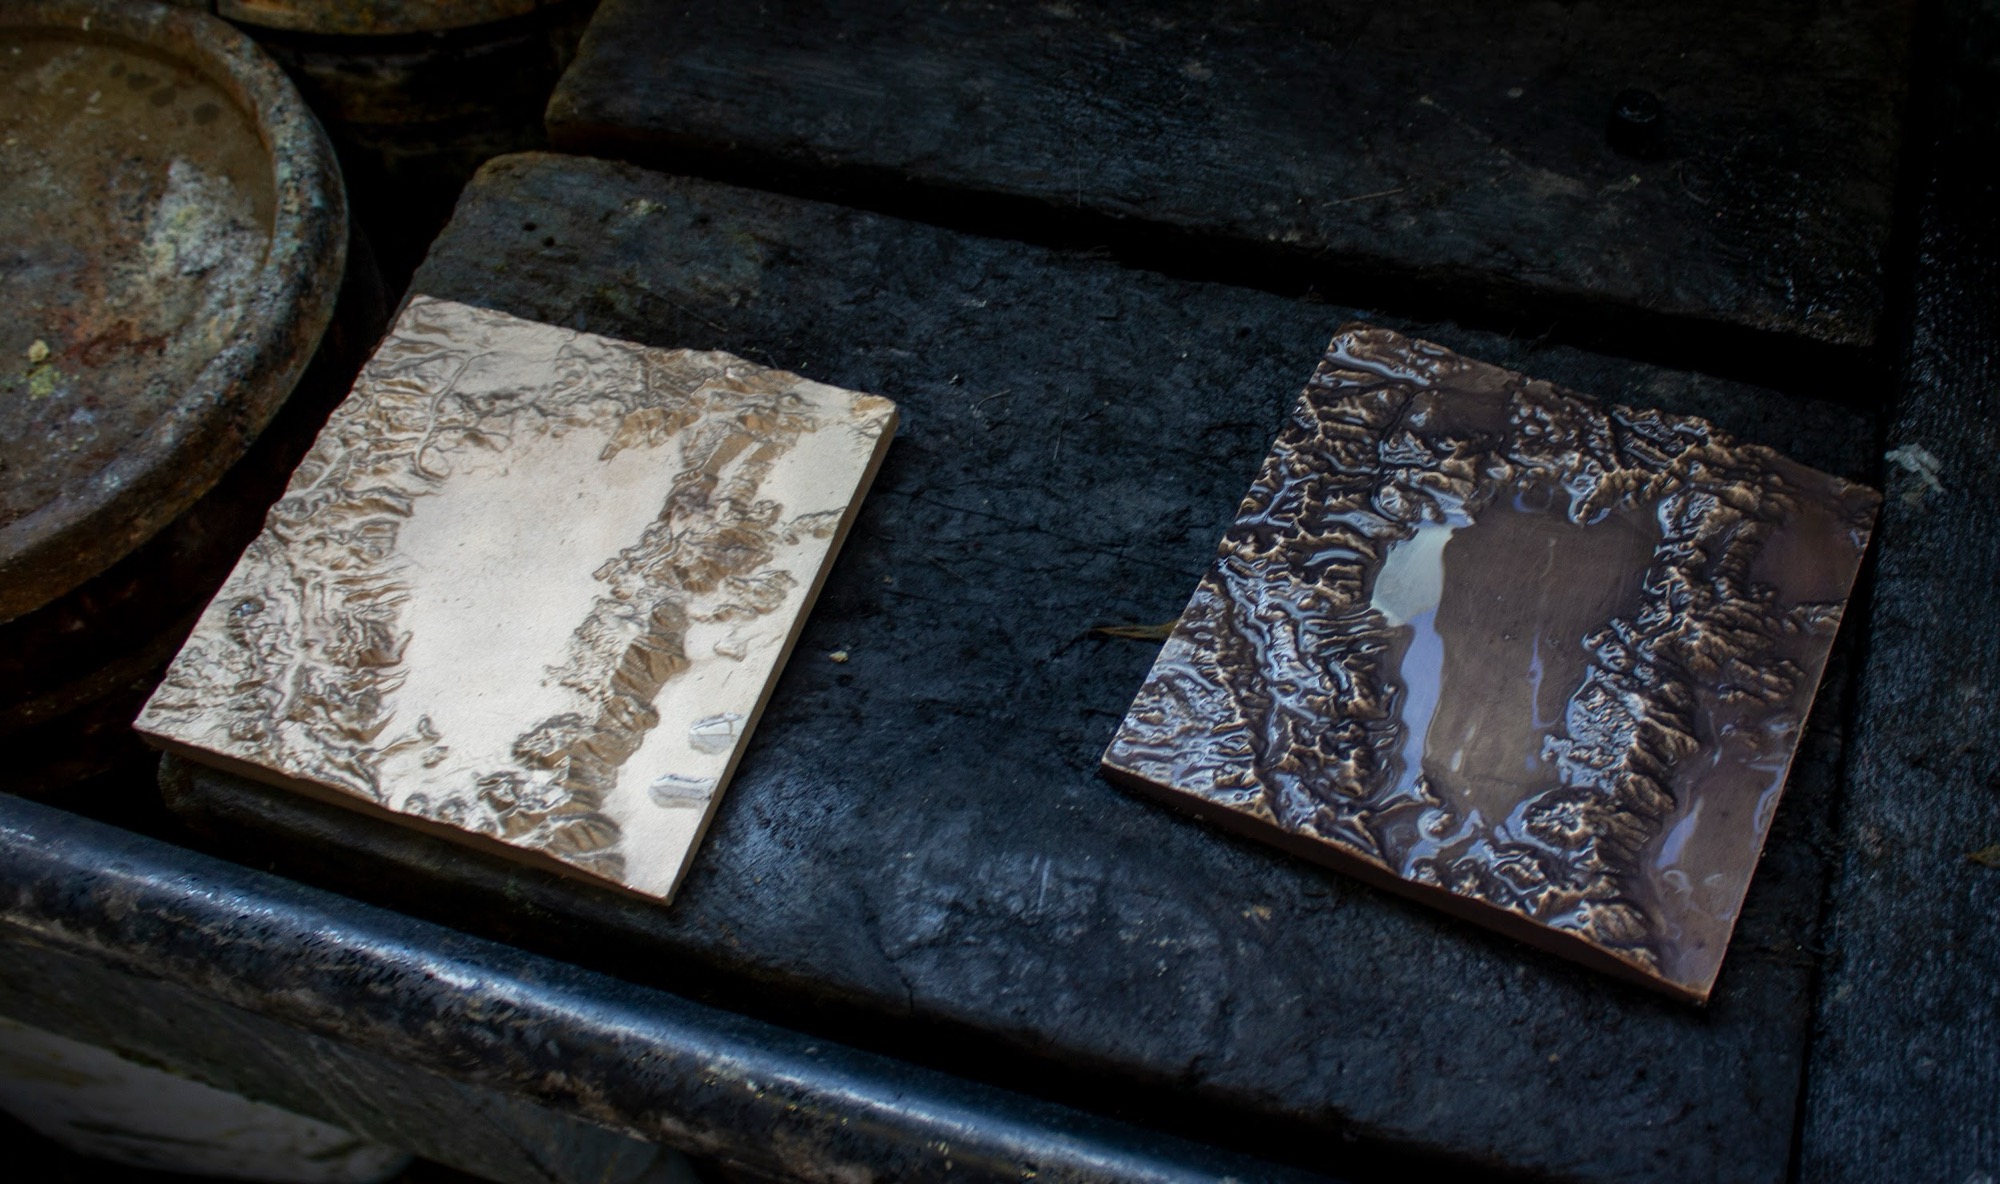
It’s tough to see in that picture, but we went with a light, medium reddish and a dark patina.
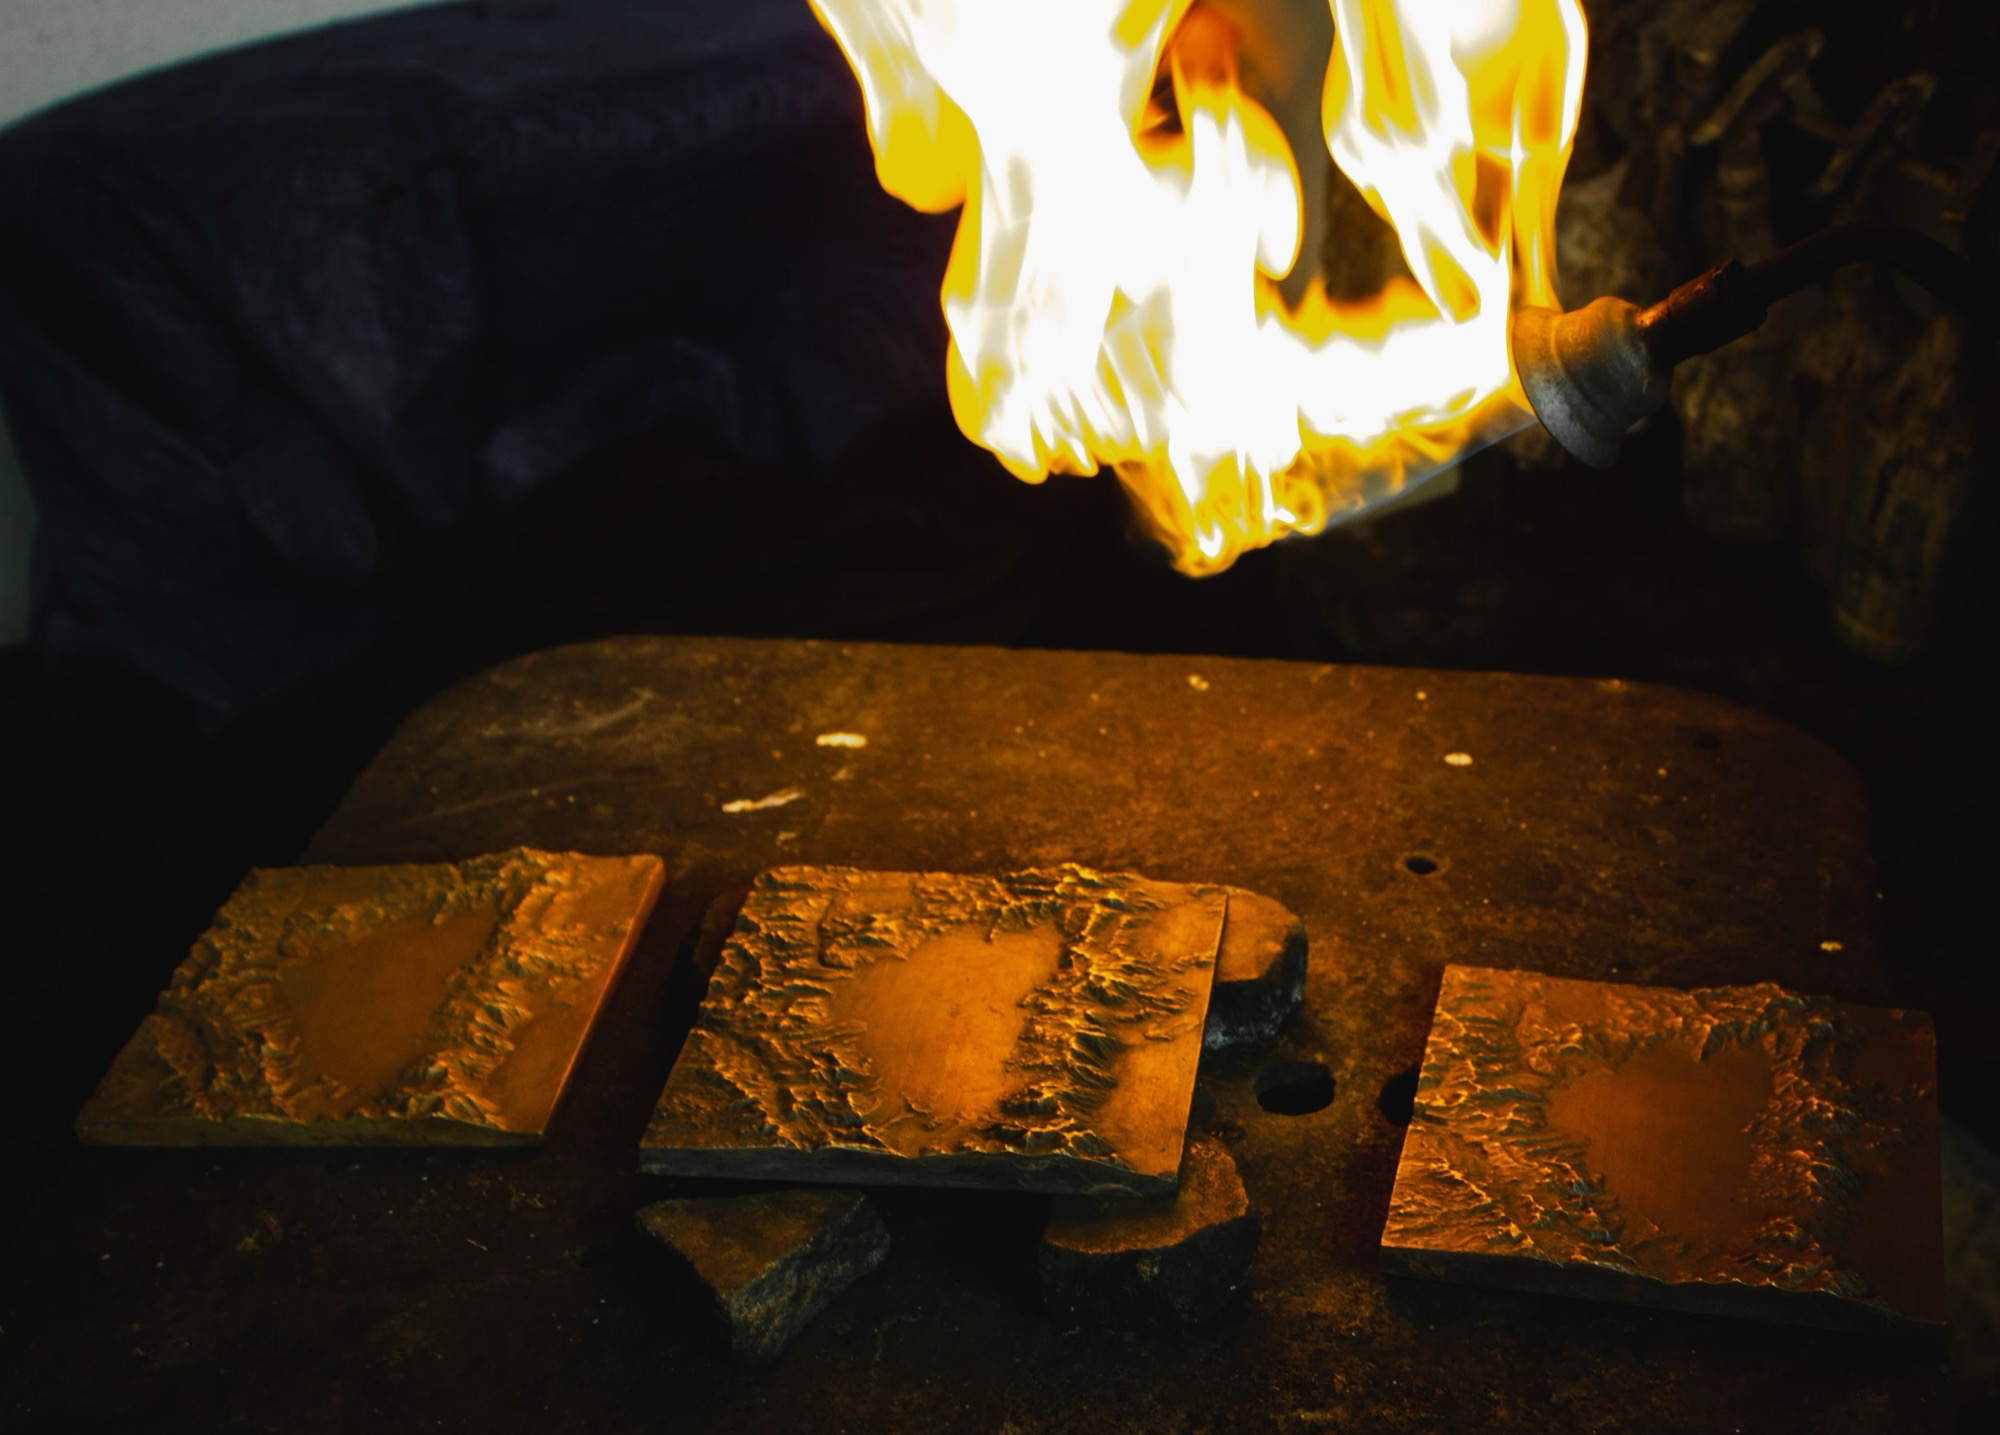
On patina day, my girlfriend and I went to the foundry and watched the patina-man apply the coats of color.
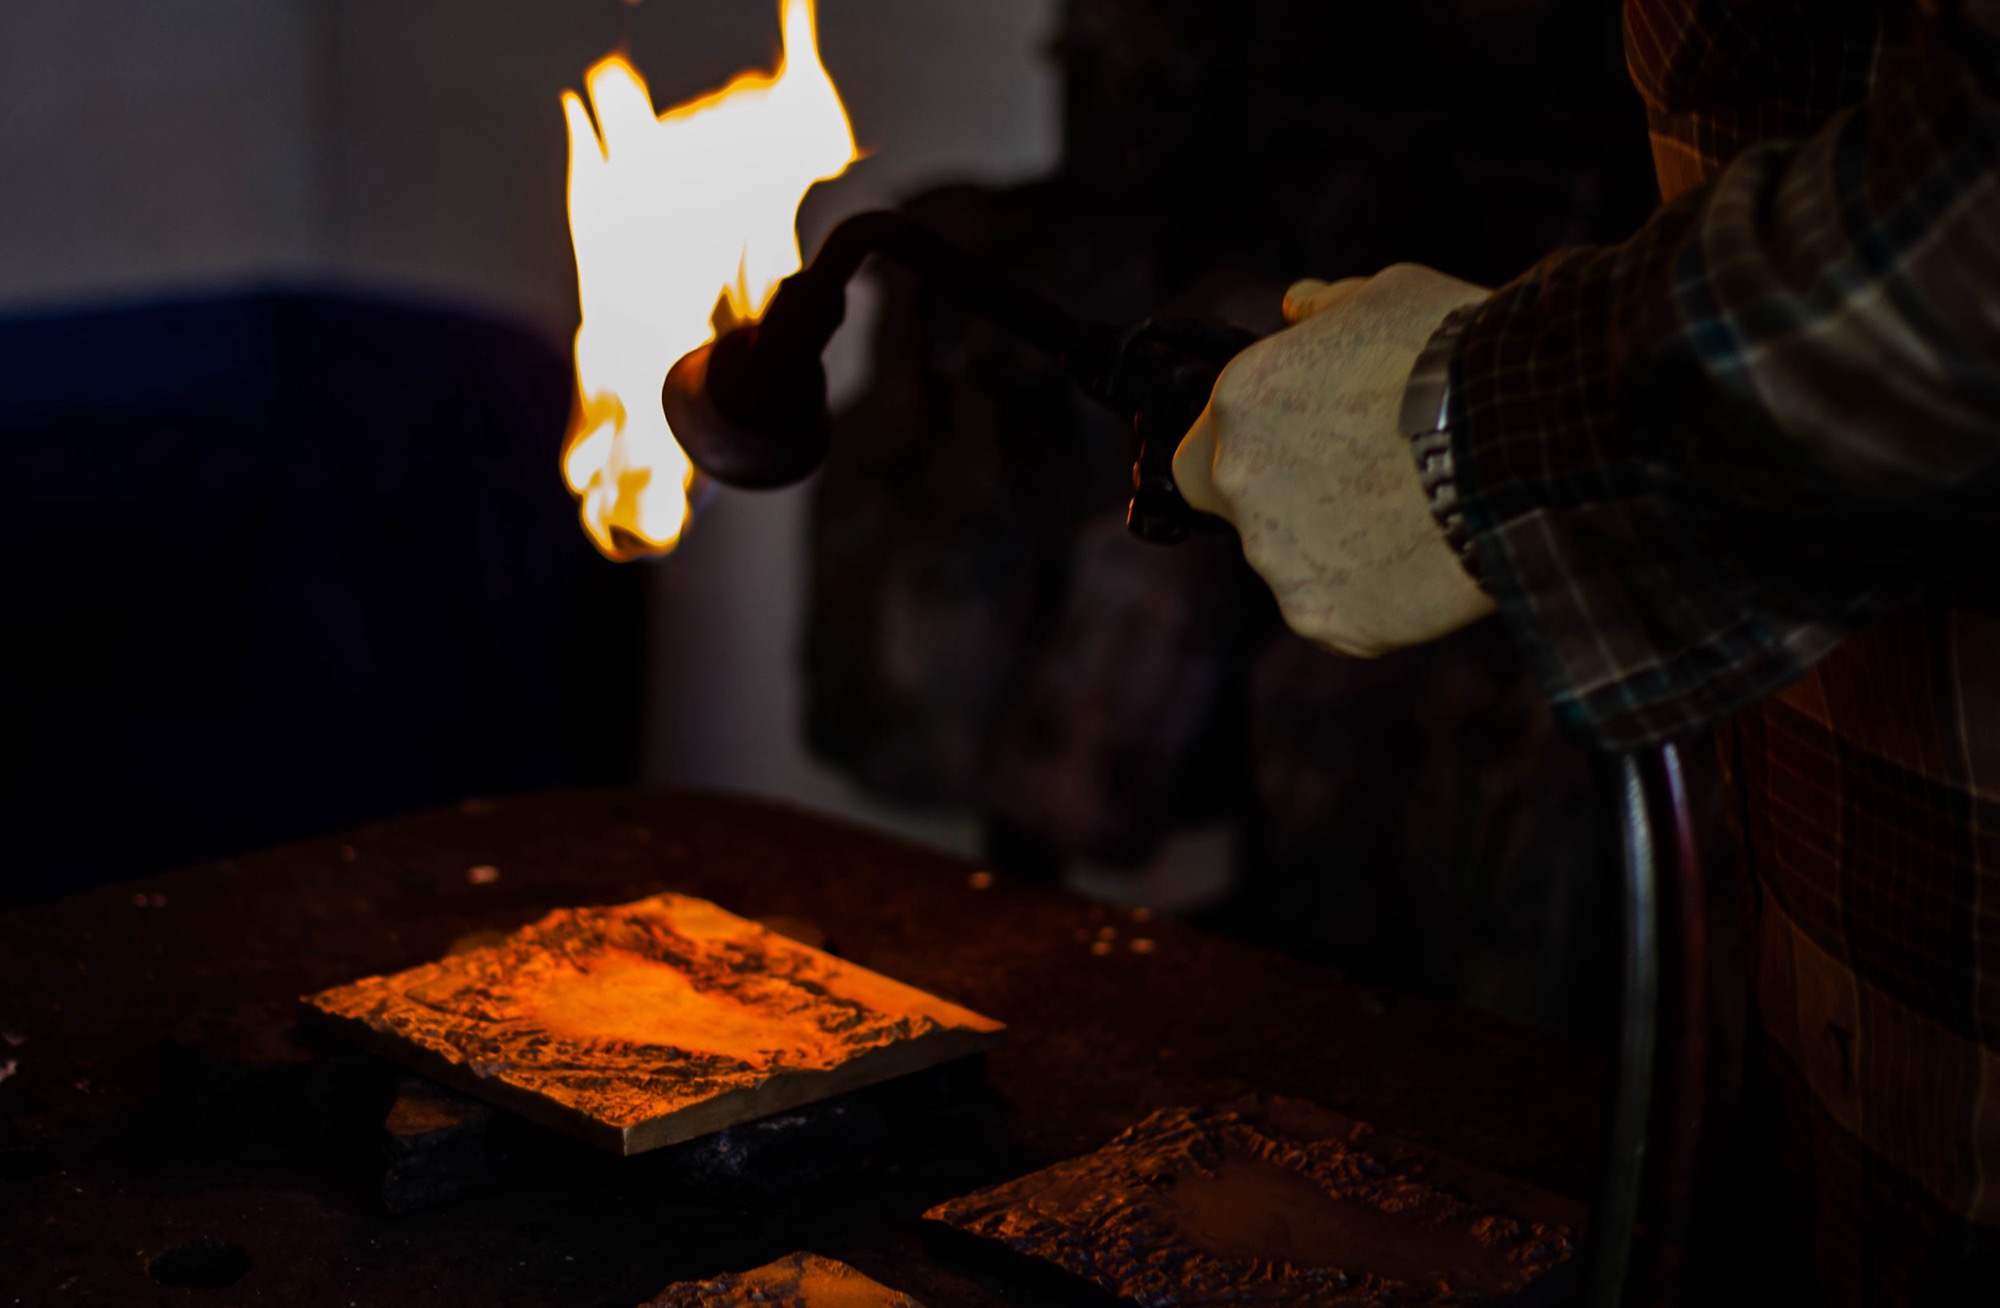
This is done by heating up the bronze, brushing on different chemicals that react with the bronze, and then finally applying a layer of hard wax for the finish.
The flamethrower (torch) was the best part. Here are the actual images from the Lake Tahoe Bronze Patina
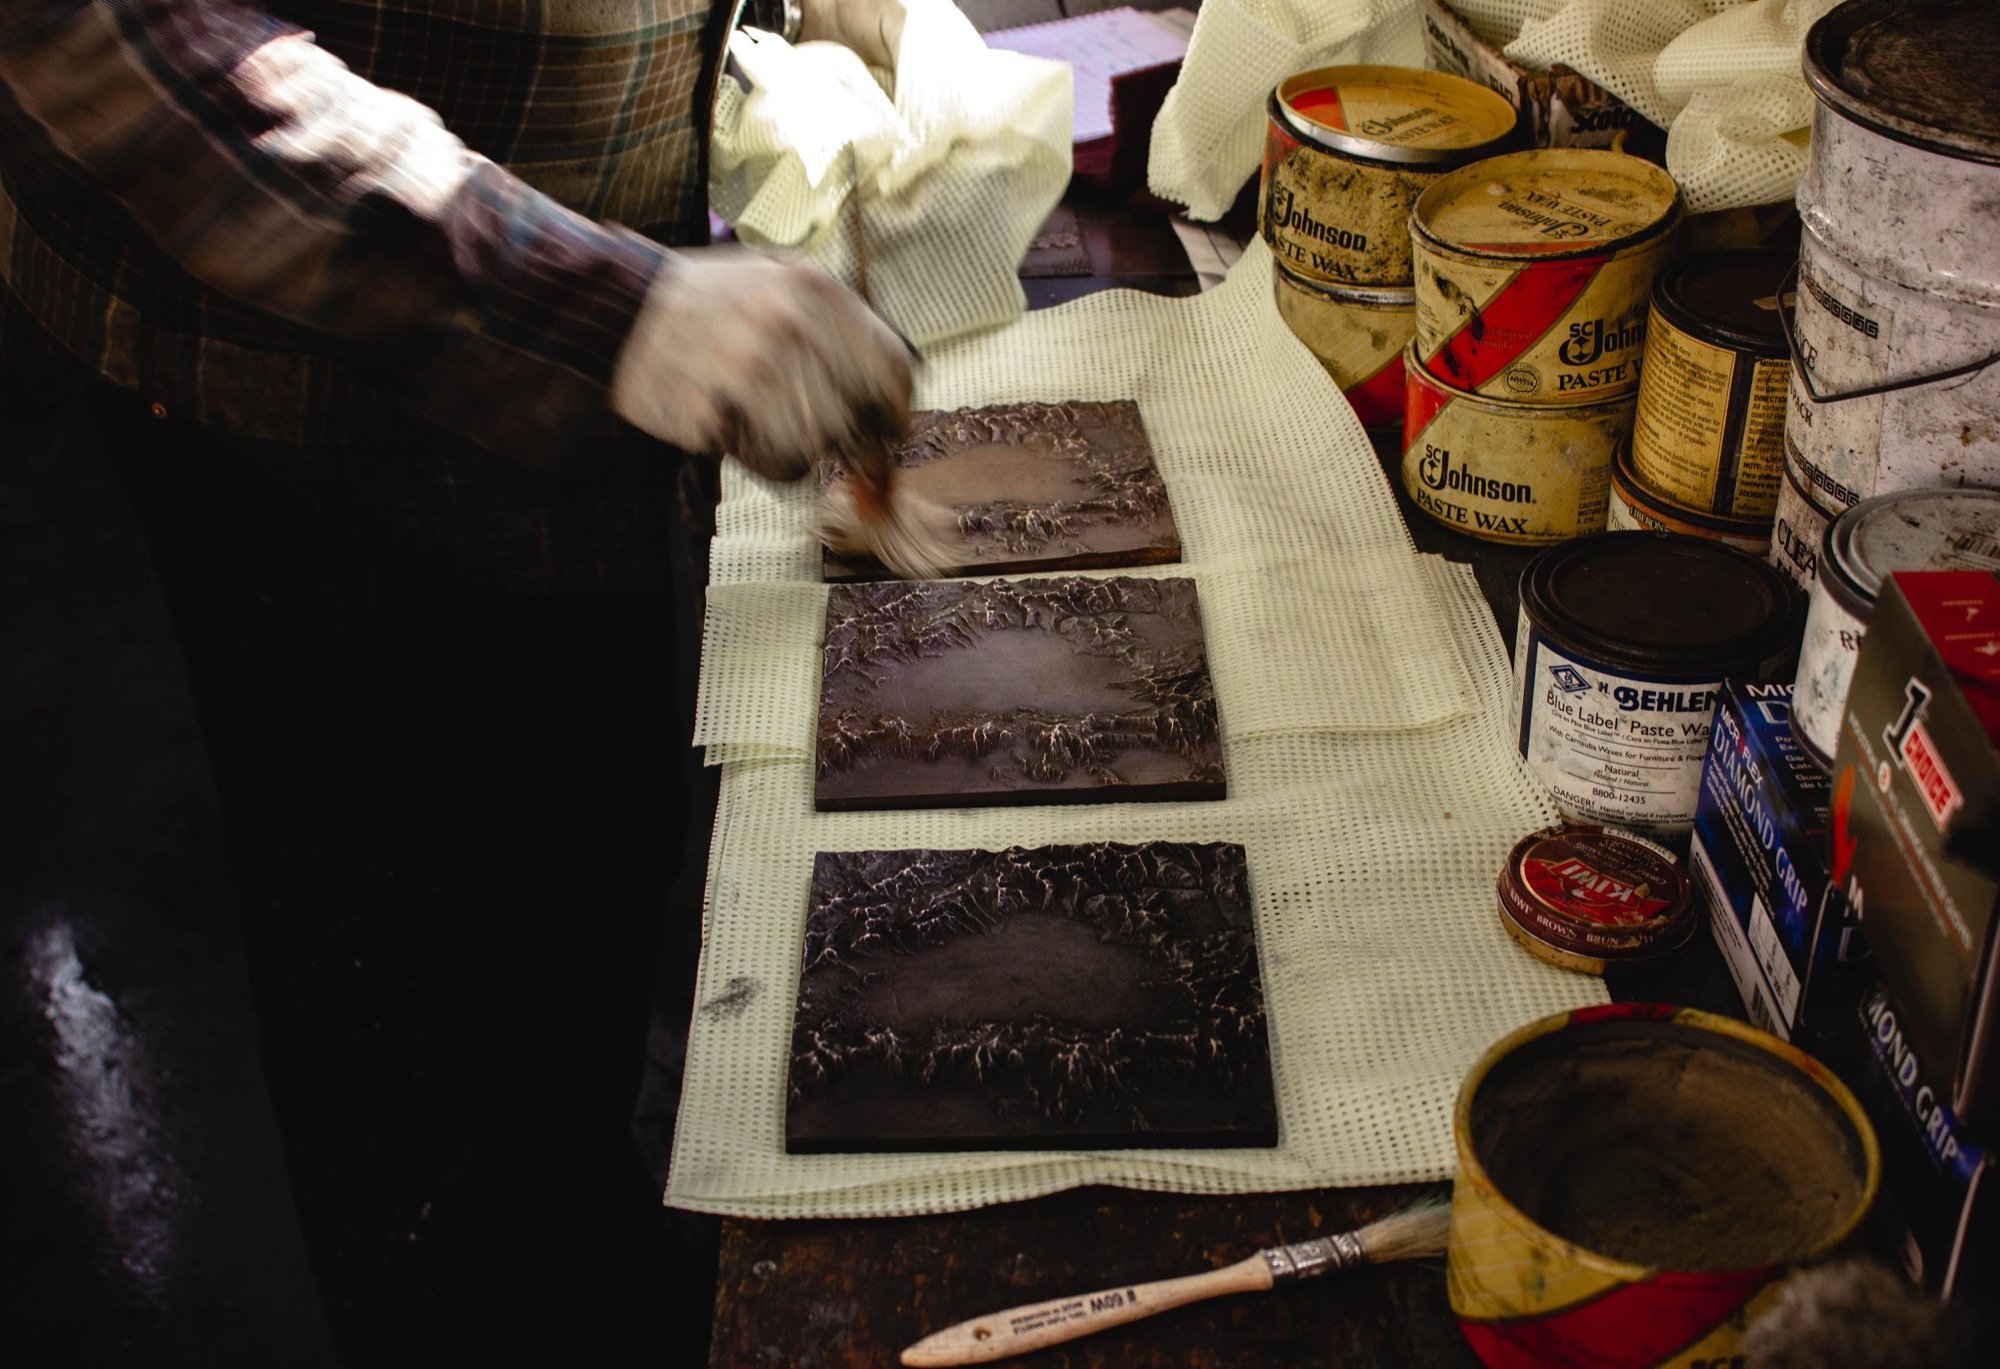
And applying the hard wax as a finish to the bronze
It was very cool to see the result of all this work. Elevation Data > 3D Print > Lost Wax Casting.
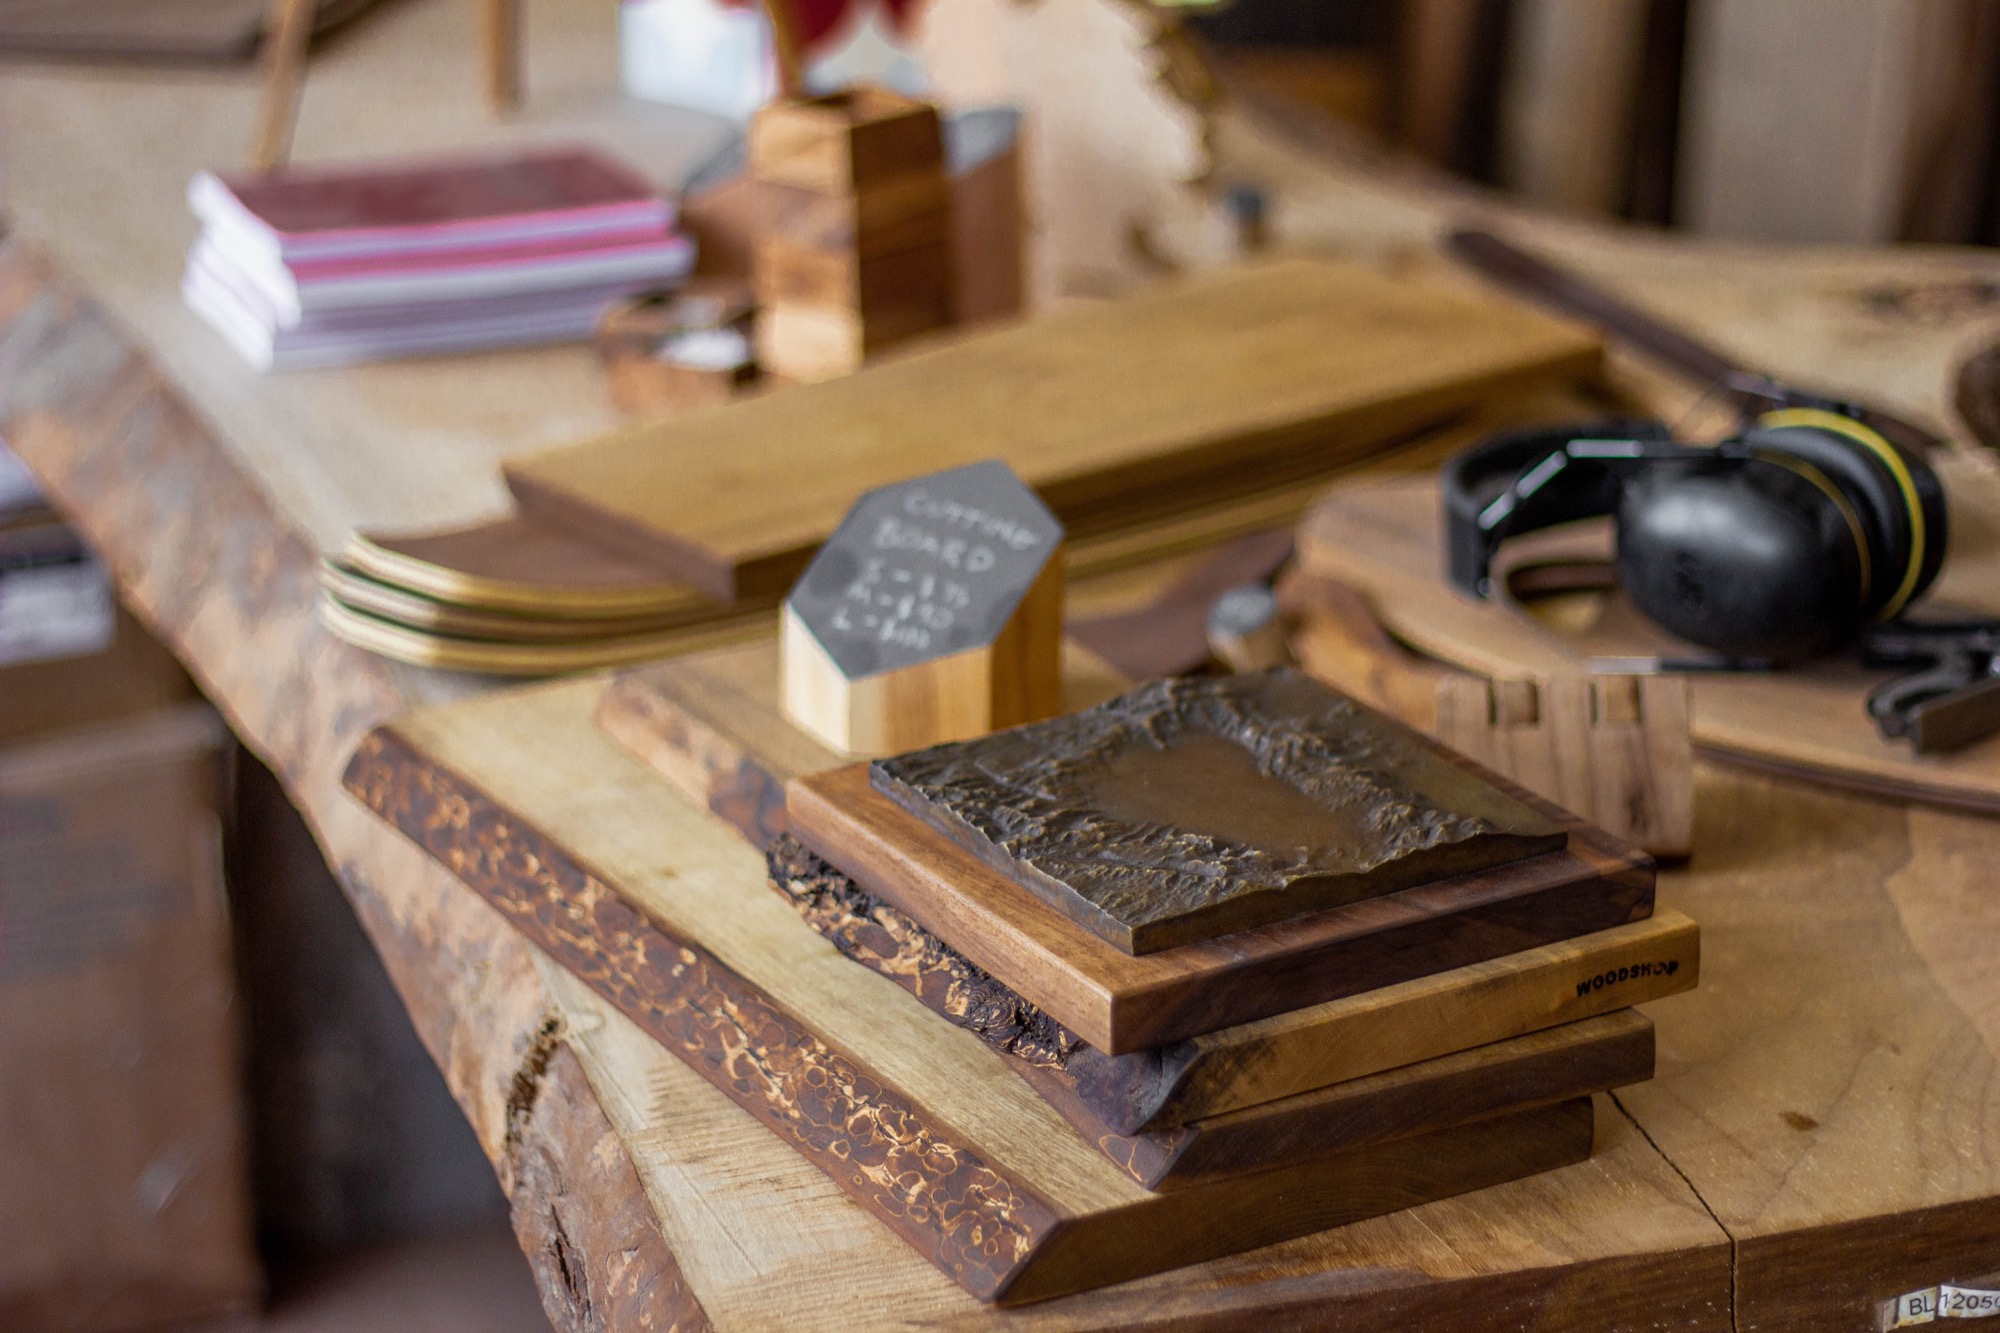
Wood Block Mounting
TL;DR: Find a woodworker who will mount for you. Labor is going to cost you way more than materials when you do these low quantities.
The final step was to get these maps mounted on a wood block.
This would:
Add a base to protect the bronze and the surface it was placed on
Add to the overall aesthetic
Give the bronze a bit more depth
In order to find a woodworker I followed the same process I did before, google until I get what I need.
I searched for “Wood Worker California” and found a few prospects. I went with three different wood workers in anticipation of working with them again in the future. I wanted to try a few partners and see who would be the best fit for this project.
This was a bit time consuming and expensive, but I’m glad I went with this approach. I learned a lot more and it was fun dealing with the different personalities. Woodworkers are more down to earth and in-the-moment-present than the average tech person.
Here are a couple shots of looking at the bronze on top of the wood samples
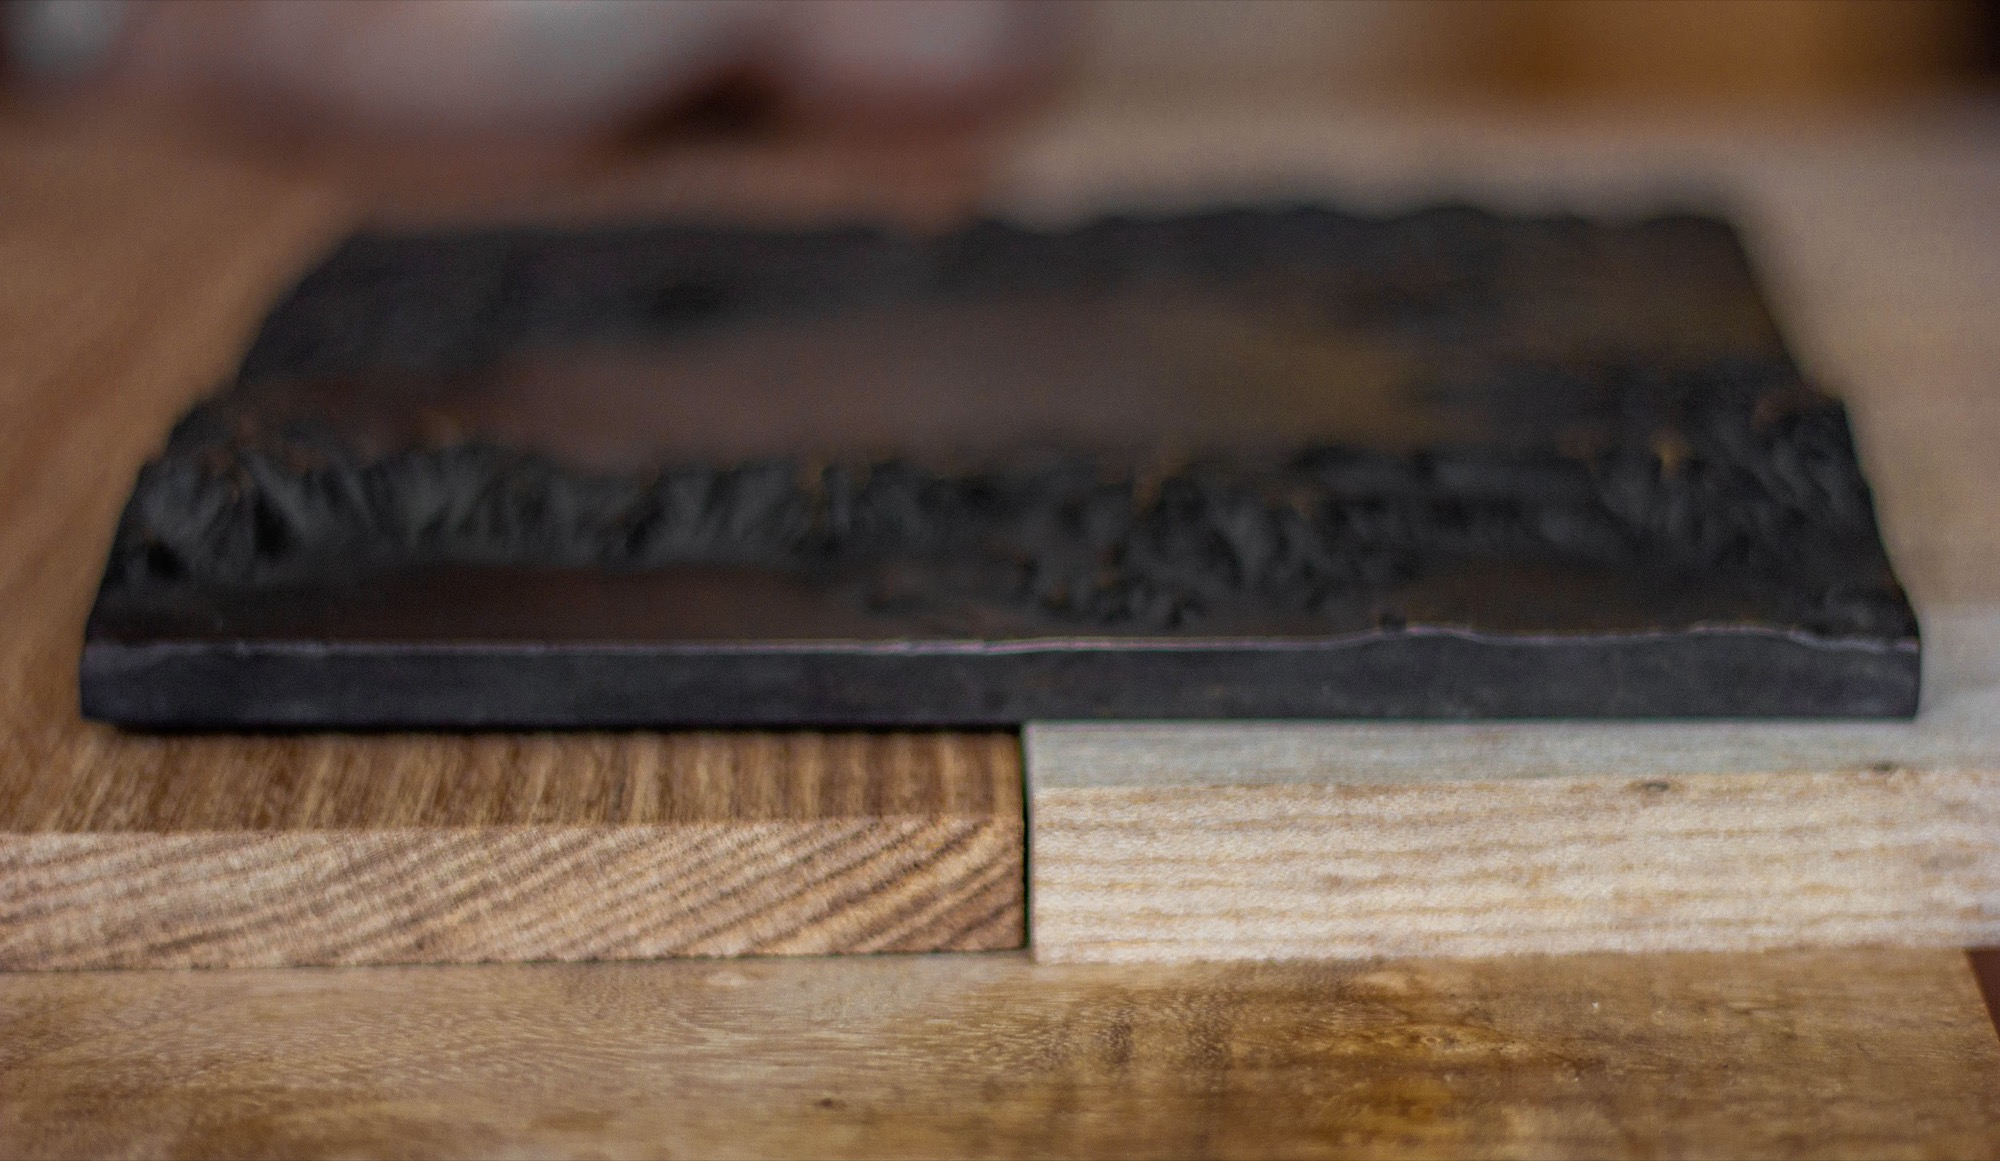
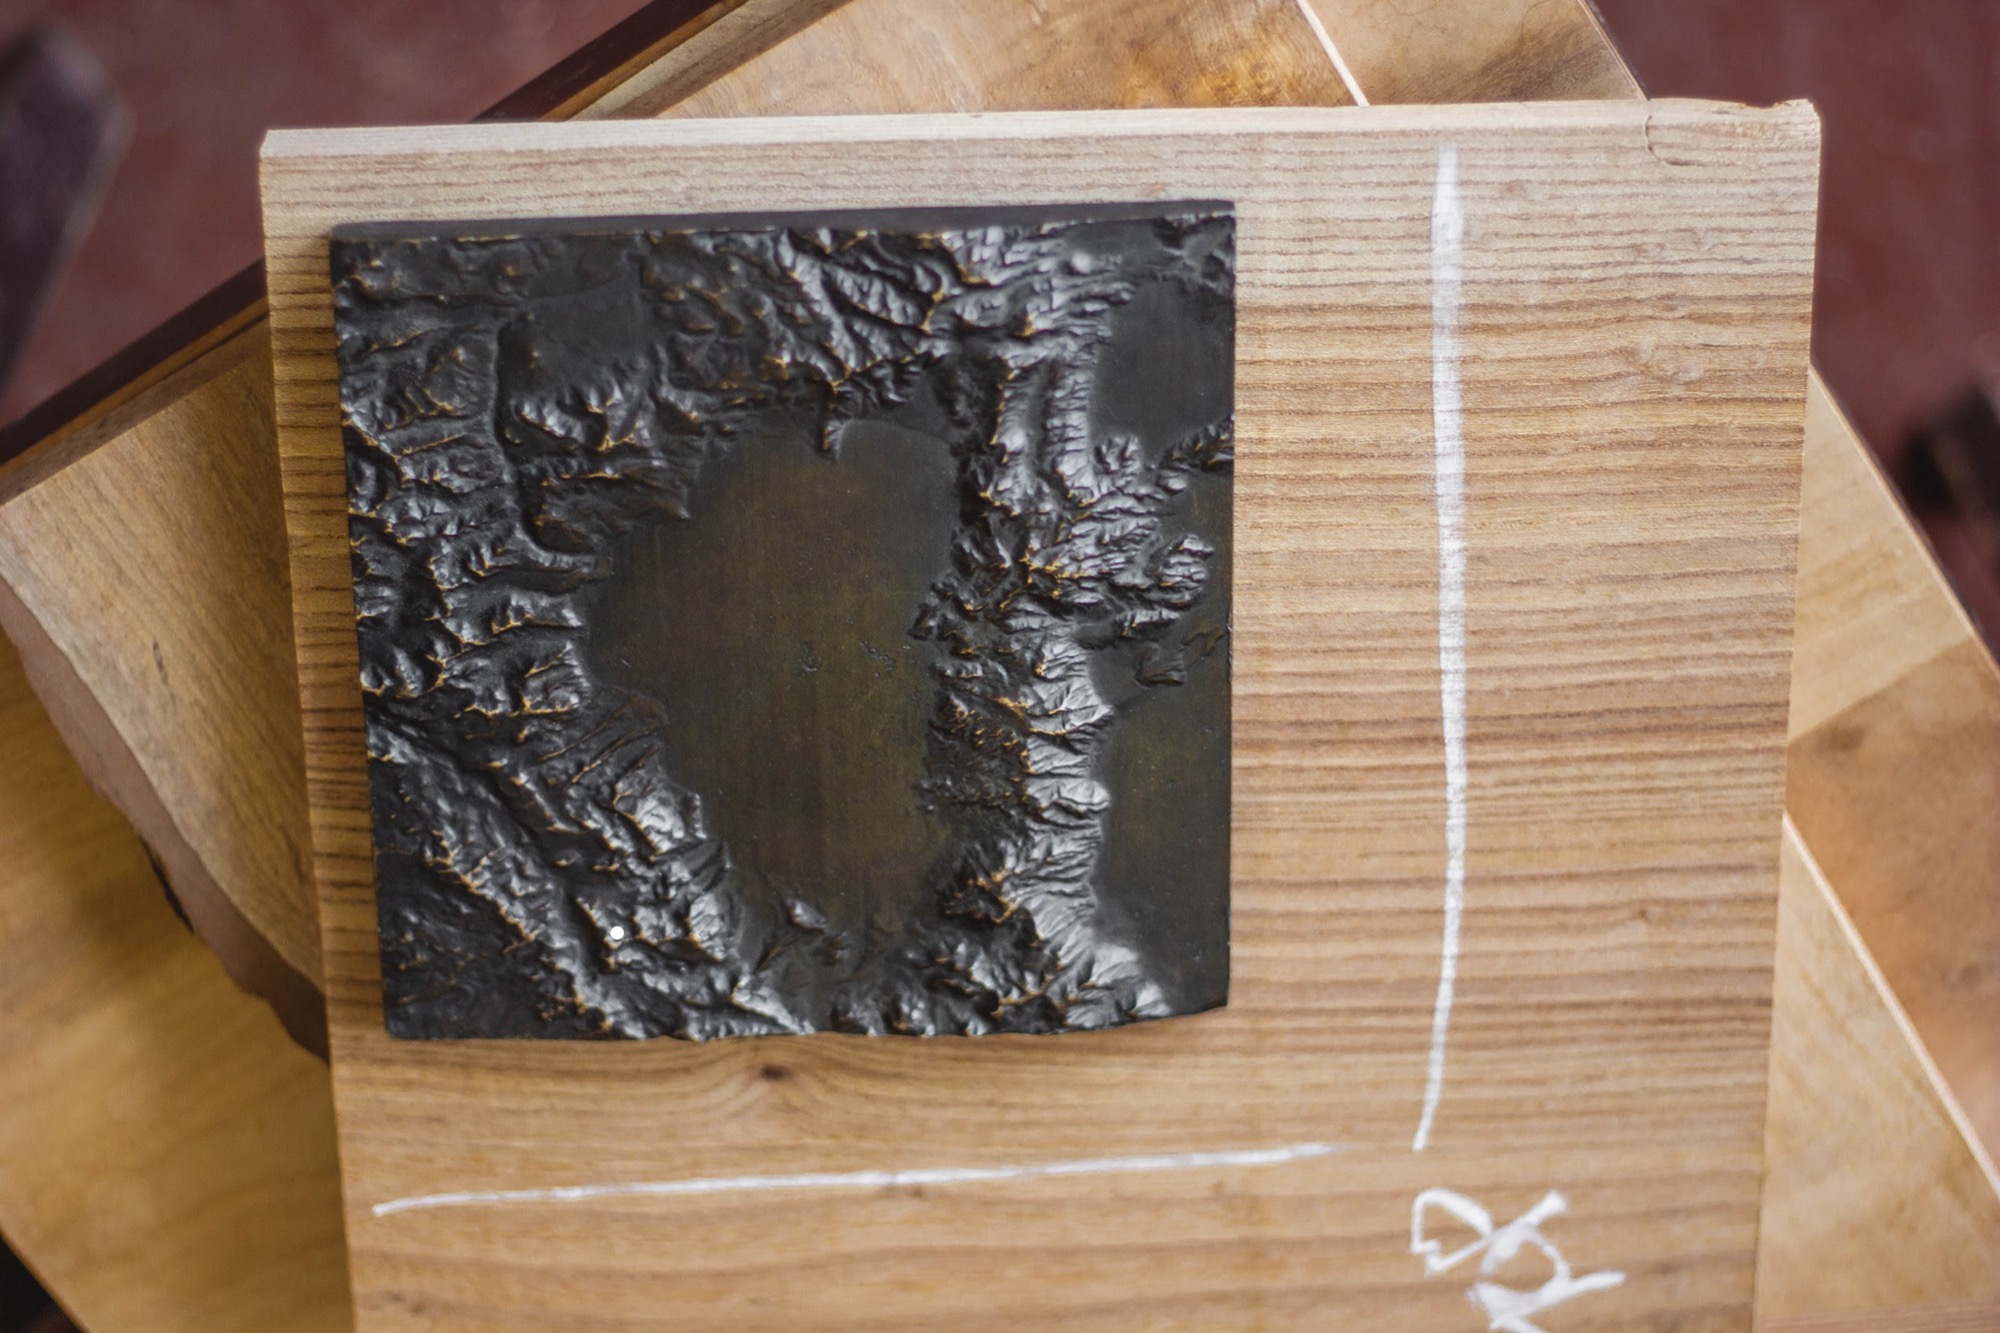
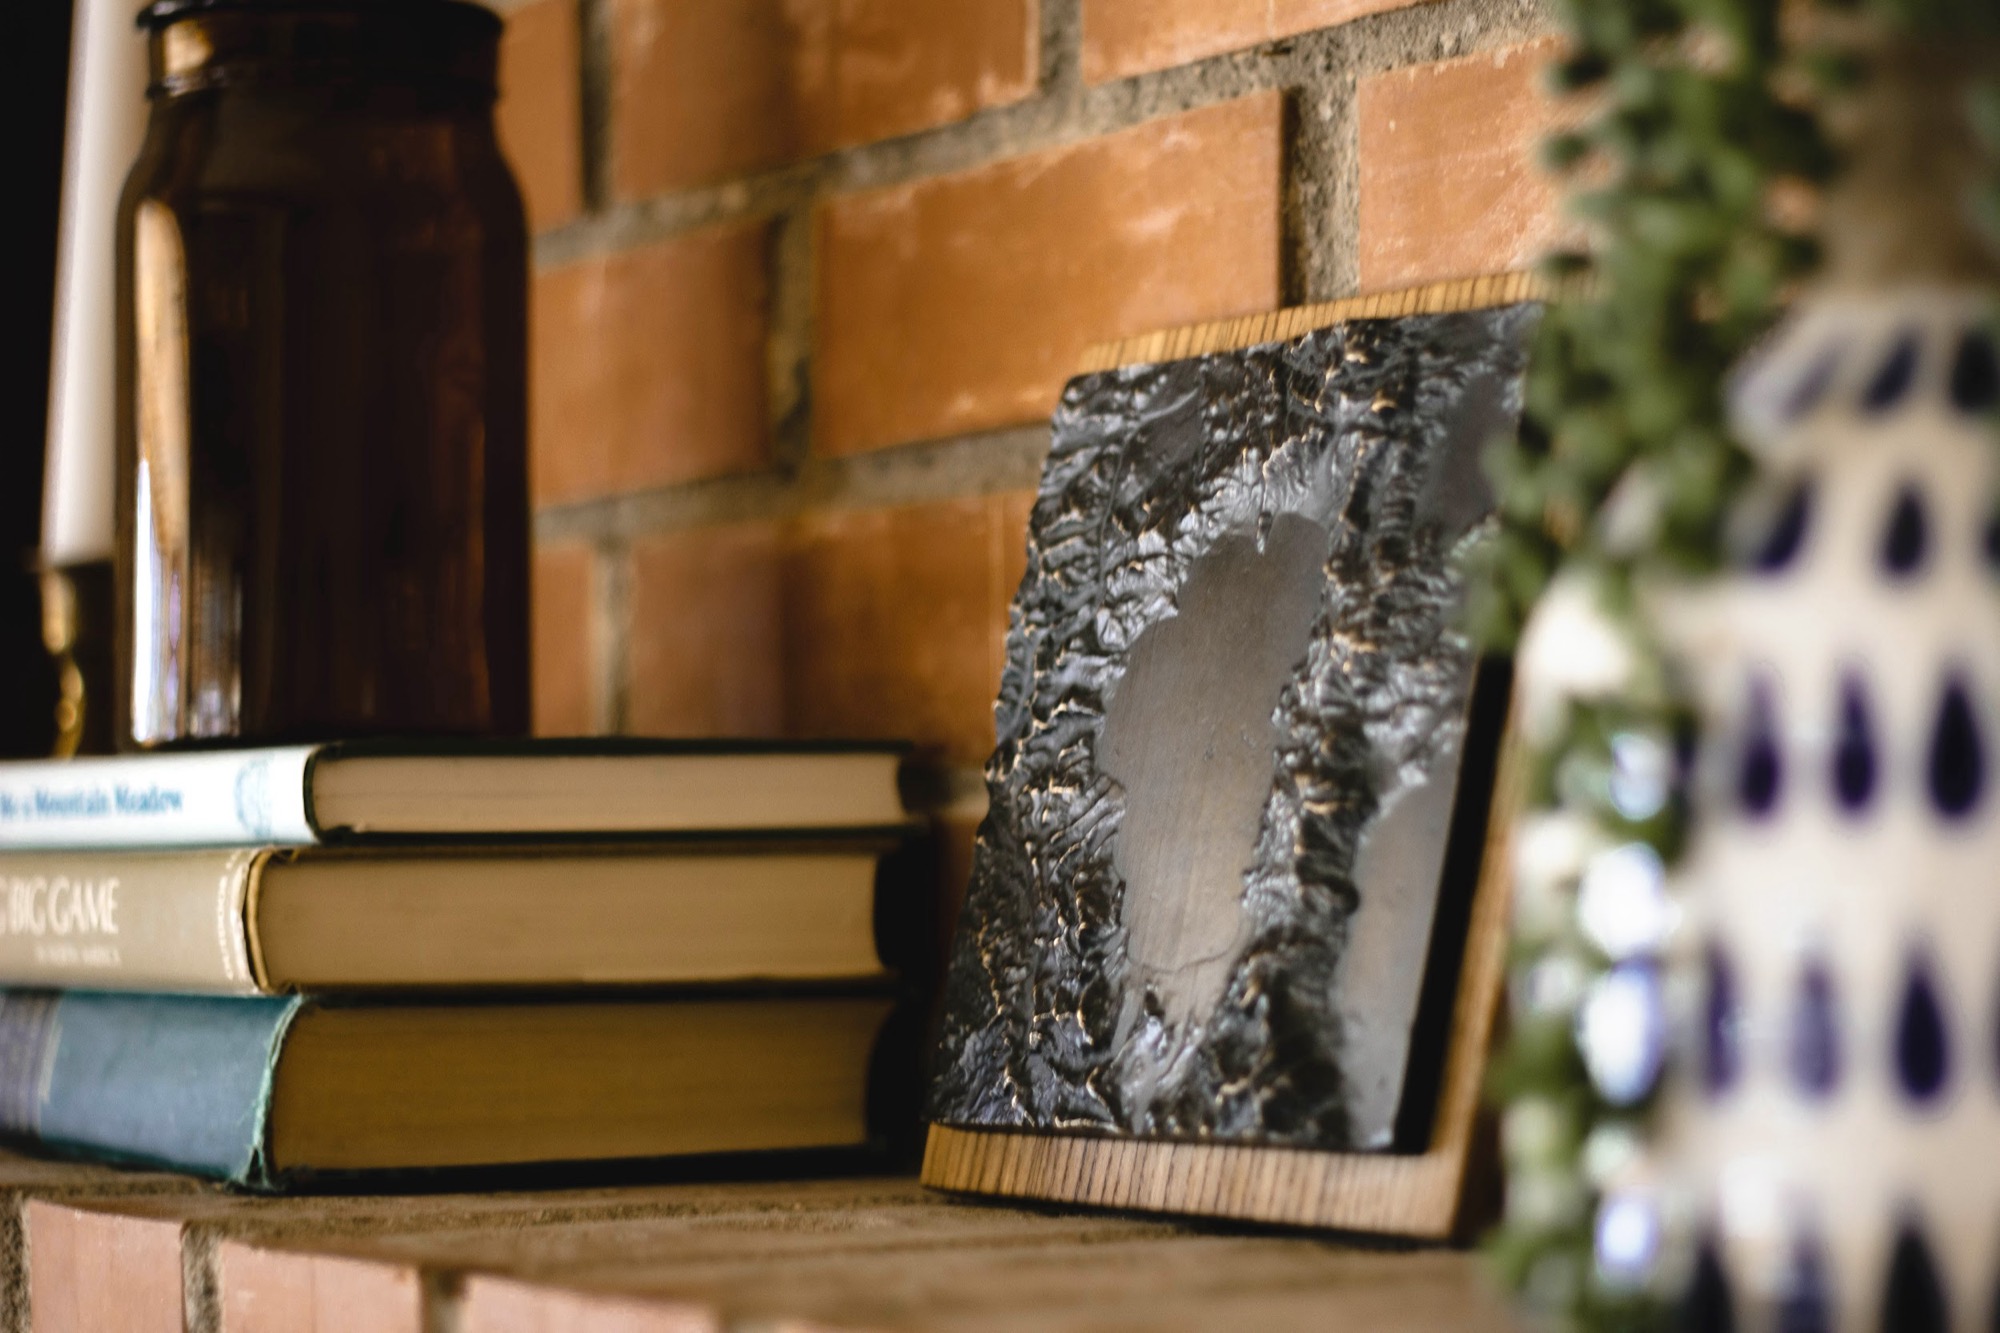
Finally we added some felt pads to the bottom of the wood block in order to give that “soft lay” feel when you placed it on a bookshelf, mantle, or hung it on the wall.
Finishing up
All in all the process took about 3 months for the first 3 Lake Tahoe bronzes. This was mostly due to the lost wax process and figuring out how to do the 3D model.
Now that I have a better idea of what I’m doing, I could get this entire process (elevation > mounted bronze) down to 1.5-2 months. This is still a long time to wait for your product to get manufactured, but that is a problem for another day.
While waiting for the product to be finished I started my next challenge: forming the business.
How do you select a brand voice and logo? Website? Domain name? Emails?
What about making your product look good with product photography?
Learn about this post-product process on Post #3: Behind The Scenes: Brand Identity (Logo, Photography) & Admin Tasks (Tools Used, Automation) -- coming out next week.
Sign up here to get this post delivered directly to your inbox.